Once you know the SSI Toolbox, it is time for configurations and parameters, and to convert a project.
Editor’s Note: This article is excerpted from chapter 3 of Extract, Transform, and Load with SQL Server Integration Services--with Microsoft SQL Server, Oracle, and IBM DB2, by Thomas Snyder and Vedish Shah.
Configurations and Parameters
Depending on the type of deployment model you choose, you can use either configuration files or parameters. The legacy model lets you create configuration files that are separate from your packages, whereas the default model lets you create parameters, project- or package-level, which are part of the entire project.
If you opt for the legacy model, you can simply right-click on the control flow window and select Package Configurations. Enable the configurations, name your file and location, pick your desired properties to use, name your config file, review the changes, and voilà: you have a config file! Config files are designated with a .dtsConfig extension. Any package, across any projects and across any solution, can share the same config file. However, the config file needs to be referenced first before it is accessed.
If you opt for the default model, you can create parameters, which are like configuration files but are located within the project or package. You can create parameters at two levels: package and project. Project parameters are created by double-clicking the project.params folder under the project name in the Solution Explorer. Package parameters are created by accessing the package’s Parameters view. Parameters in the package are only accessible to the package itself and no other packages. Parameters in the project are global and accessible by every package in the project.
Converting a Project
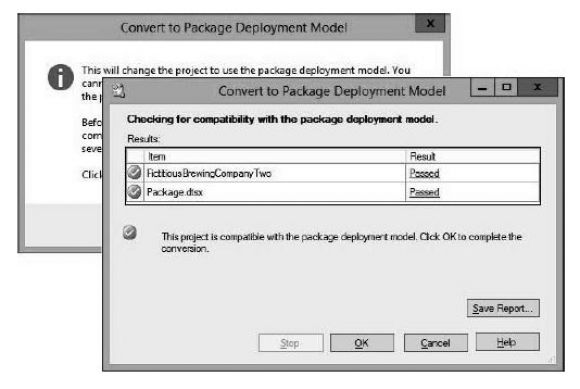
As we mentioned at the beginning of the chapter, the default model of a SSIS solution is the project deployment model. To convert it to the legacy package deployment model, right-click the project name and then click Convert to Package Deployment Model, as shown in Figure X.
Figure 1: Converting a project to the package deployment model
Once your project has been converted to the package deployment model, assuming there are no errors, you will be able to see the model type next to your project name, as shown in Figure xx.
Figure 2: A converted project
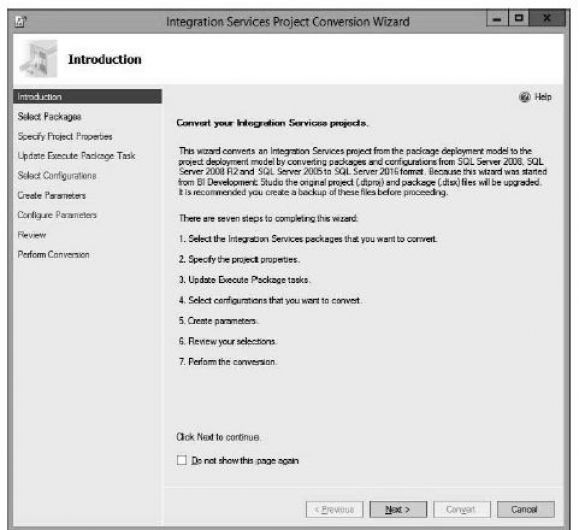
So, what does it take to convert your legacy project to a project deployment model? Well, doing so is very simple: you can just open your legacy solution using SSDT, and it will detect the discrepancies compared to the default model type and provide upgrade options. When you are converting a project to this model, you are technically taking all the packages and configuration files from the legacy model and putting them in an .ispac file: the deployment utility of the project deployment model. If your project was already built as a package deployment model within SSDT, then right-click the project name and click Convert to Project Deployment Model. The Integration Services Project Conversion Wizard will be displayed, as shown in Figure 3.
Figure 3: Converting to the project deployment model using Conversion Wizard
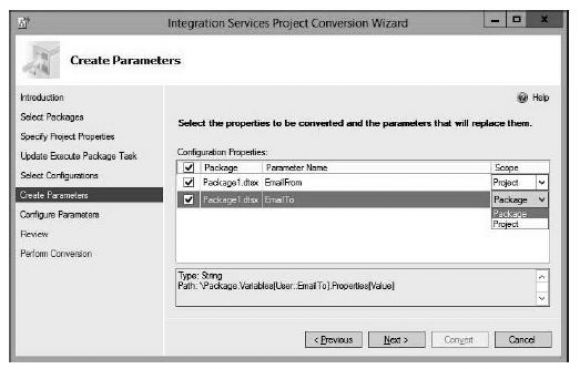
One important thing to note here is the verbiage on the first screen of the wizard. Since the conversion wizard was accessed from within SSDT, it will use the same project folders and overwrite the existing contents in that folder—thus, the warning to back up any important files before conversion. The Conversion Wizard, once you step through it, will also provide an option to convert any configuration files used into project parameters, as shown in Figure 4.
Figure 4: Project parameters
You can also access the Conversion Wizard directly from Windows Explorer for your desired SQL Server version: C:\Program Files (x86)\Microsoft SQL Server\130\DTS\Binn\ ISProjectWizard.exe.
The only difference is the way the Conversion Wizard handles the conversion (Figure 5).
Figure 5: Conversion Wizard, directly accessed
Next time: Database Setup. Can't wait? Pick up your copy of Tom's book, Extract, Transform, and Load with SQL Server Integration Services at the MC Press Bookstore Today!


LATEST COMMENTS
MC Press Online