No doubt you received a stack of Virtualization Engine (VE) CDs with your i5/OS V5R3 or V5R4, and you may be wondering just what to do with them, besides setting them aside and letting them collect dust. Well, hidden beneath all the Virtualization Engine layers is a gem called IBM Director. IBM Director allows you to manage resources not only on your System i, but also on your System p, System x, and even System z running Linux.. This includes systems running AIX, Linux, Windows, or i5/OS, all in a single package. These can be partitions or standalone systems.
Installing the IBM Director Server
It's easy to get started with this systems management tool. First, take the Virtualization Engine CD #1 and insert it into a Windows workstation; it will start up automatically and display the sign-on panel shown in Figure 1.
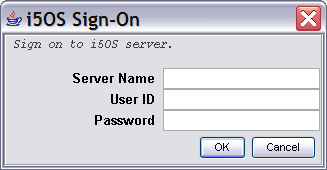
Figure 1: The first thing you'll see is the sign-on panel for VE Install for i5/OS. (Click images to enlarge.)
The VE Installation Wizard will lead you through the install of the IBM Director server. Note that you will need to identify the System i server that will be used to manage your network. To simplify install, when prompted, select only IBM Director Server as the service to install. Other VE products can be installed later. This will "push" the licensed program product 5722DR1 (V5R1M0, *BASE) to your System i server. You can validate that by using go licpgm, option 10, once the install completes. Additional panels not shown here will be displayed, leading you through the set of CDs, prompting as needed. You should be able to take the defaults to complete the install process.
Starting the IBM Director Server
Once the server is installed, you can start it by simply running the following command on your System i:
STRTCPSVR *DIRECTOR
An alternative way to start the server is to go into qsh, cd to /qibm/proddata/director/bin and use the twgstart command.
It will take the server a few moments to start up, especially the first time as it creates the Java programs for the various jar files that are shipped with the product.
Allowing Usage of IBM Director
Once the server is started, but prior to attaching a console client, you will need to determine who your IBM Director administrators will be. Using WRKFCNUSG on your System i, you can specify the user profiles that should be administrators and those that should be super administrators. Use the following command to display only the IBM Director usage entries:
WRKFCNUSG QIBM_QDIR*
You will see the panel shown in Figure 2.
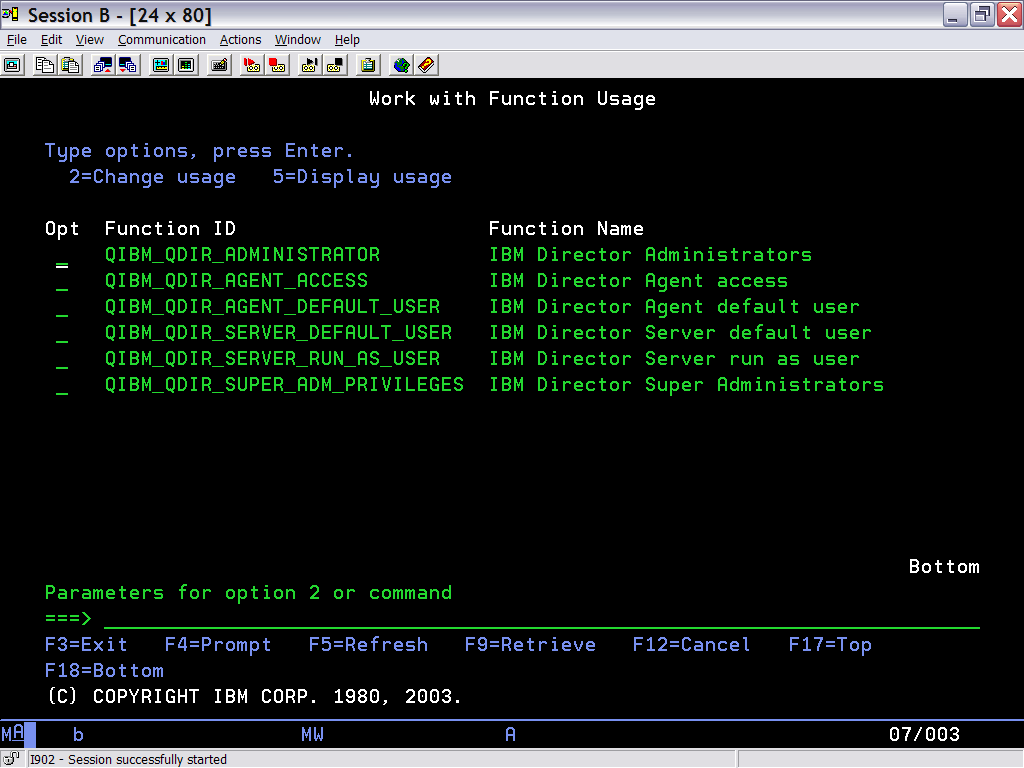
Figure 2: Use WRKFCNUSG to specify the administrator user profiles.
Select option 2 to change QIBM_QDIR_SUPER_ADM_PRIVILEGES and specify your main systems administrator. Fill in the user profile along with *ALLOWED for the usage (Figure 3).
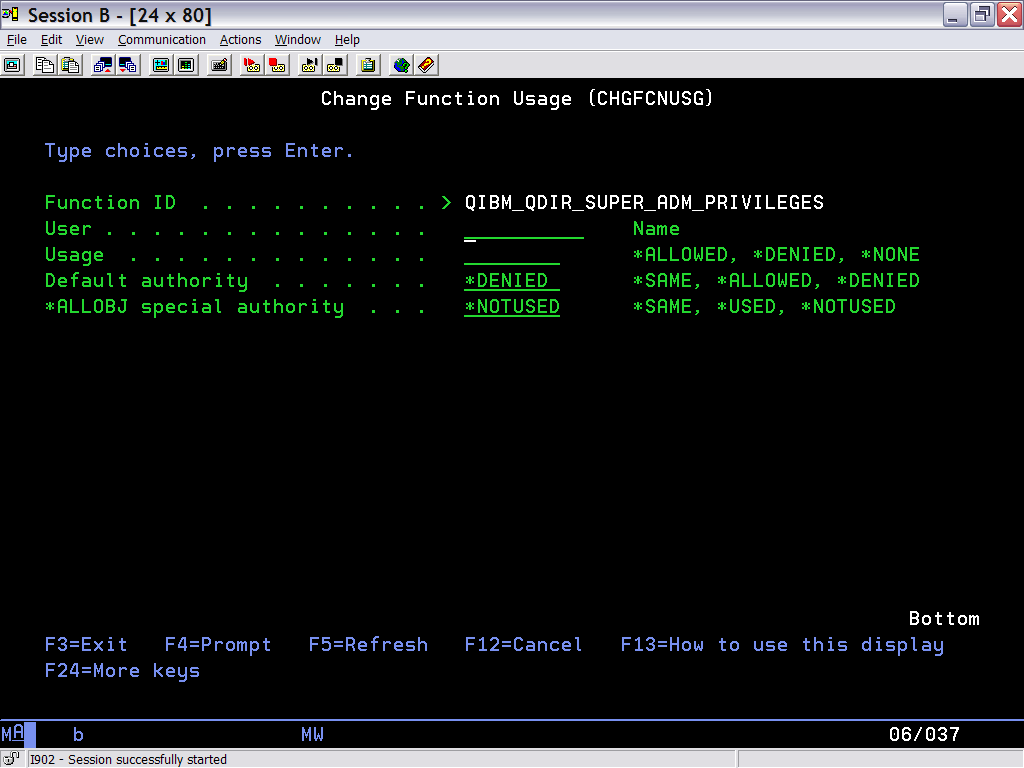
Figure 3: Use WRKFCNUSG option 2 to specify your main systems administrator.
IBM Director allows for the administration to be subset amongst users. For example, you can specify that one administrator manages only systems in San Francisco and another only systems in New York. Additionally, you can allow or deny access to specific tasks. Initially, you should consider setting up at least one super administrator and a backup and then additional administrators as needed. This is done using the IBM Director console. Using WRKFCNUSG allows specific users access from the console to the server.
Installing IBM Director Console
The next step is to install the IBM Director console on a Windows, Linux, or AIX system. The product is currently a client/server type product with a GUI on the workstation. In fact, you may consider the product as a three-tiered product—console, server, and agent—but we'll get to that soon enough. The CD titled IBM Director 5.10 (2 of 2) for i5/OS contains the IBM Director Console. For example, when using a Windows workstation, find and double-click on directorconsolewindowsi383ibmsetup.exe. The InstallShield wizard will start and guide you through the installation.
Using IBM Director
After installing the console, click on the IBM Director console icon, which will be installed onto your desktop. The login panel will be displayed. Specify the name of the server where you installed IBM Director server. Enter the administrator's user ID and password, using the WRKFCNUSG command.
The panel shown in Figure 4 will be displayed the first time the console is brought up.
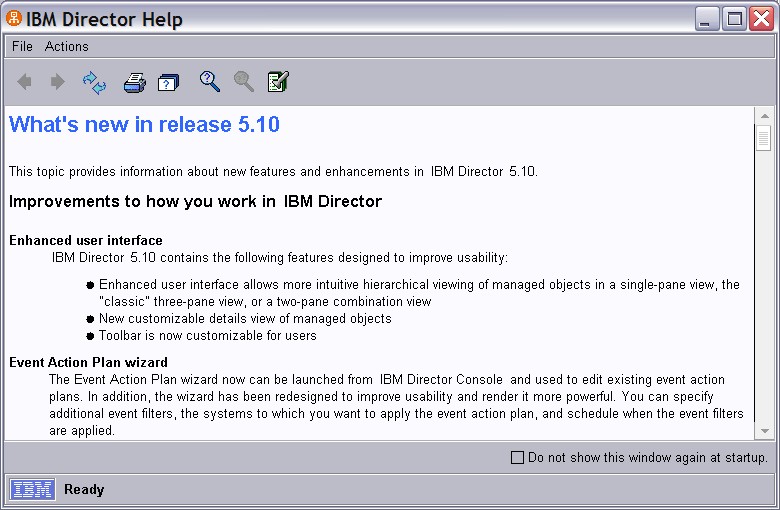
Figure 4: You'll see this panel the first time you bring up the IBM Director Console.
Read this help panel to learn some of the basics about IBM Director and what's new in this release. This product has been serving System x for several years, and in fact, the server can be installed on Windows, Linux, and AIX servers, but what better platform than System i to manage your network of workstations and servers?
Close the Help window and you will be presented with the panel shown in Figure 5.
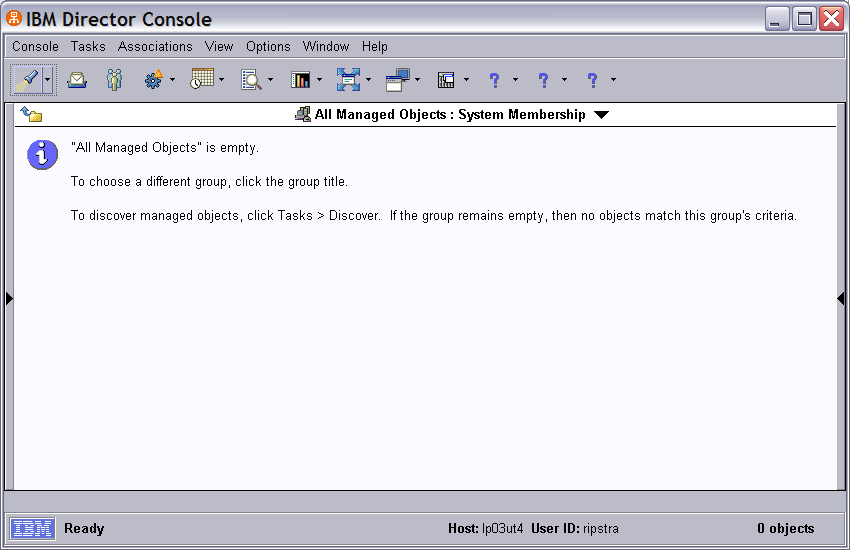
Figure 5: You've now accessed the IBM Director Console.
This is where some folks who are unfamiliar with the product get stuck. The first thing to do is to click on the black triangles that are half-way down on either side of the panel. This will produce the three-pane window shown in Figure 6.

Figure 6: Click on the small, black triangles to get to this three-pane view of IBM Director Console.
Note that the left pane is titled Groups. IBM Director provides some standard grouping of "resources" in your network (referred to as Managed Objects in the middle pane). In the right pane is a list of tasks you can use to manage those resources. Groups and tasks are dynamic; you can create your own groupings and your own tasks to your liking. IBM Director is very flexible in that you can extend it easily by defining tasks as you go, and, using the IBM Director SDK, you can write your own extensions for the server and agent. IBM Director provides the framework within which this can be done.
The middle frame of the panel is where the action occurs. When you use the console for the first time, it does not have anything to "manage." So how do you populate the managed objects so they can be managed? The simplest way to get started is to simply push the Discover button, which is the flashlight icon in the task bar in Figure 6. Over the next few minutes, broadcast messages will be sent to systems on the same subnet. This simple discovery process will find resources that are on the same subnet as the server to get you started. You can also manually add systems as well as do more complicated discoveries as documented in the IBM Info Center. Resources found will automatically be added to the groupings in the left pane. For example, the top grouping, All Managed Objects, will allow you to view the entire list of resources that the server is managing. The server you select, in this case a System i, keeps track of the resources that can be managed. In addition, the other groupings (Systems with i5OS, for example) will also be populated such that if you want to see only those systems with i5/OS installed, you can click on the group and see only those resources matching that grouping. You can add groupings via menu options with either a static list of resources (for example, all the systems in San Francisco) or a dynamic list of resources (for example, resources that are offline) so that, at a glance, you can see them in a grouping that makes sense for your management purposes.
The resources that are being managed are categorized into three levels of functionality:
level 0, level 1, and level 2. Simply put, level 0 resources have no IBM Director software installed, level 1 resources have only core services (i.e., limited functionality), and level 2 contains a full IBM Director agent. Note that when a resource has the IBM Director server installed, it is considered a full level 2 agent and can be managed by another server in the network, allowing for redundant management of resources. System i can be either level 0 or level 2. If a System i is being managed, IBM recommends that it have either the full server or the agent installed.
After installing the server and console and discovering resources in your network, you will want to decide what resources are to be managed. In this case, it is recommended that the full agent be installed onto those resources. To install the agent, refer back to the stack of Virtualization Engine CDs you received. One of those is titled IBM Director 5.10 Agents. You will find the file D:/FILES/Director/Directori5OSAgent.zip, which is the importable image into the Software Distribution component of IBM Director. From the IBM Director console, follow Figures 7 and 8.
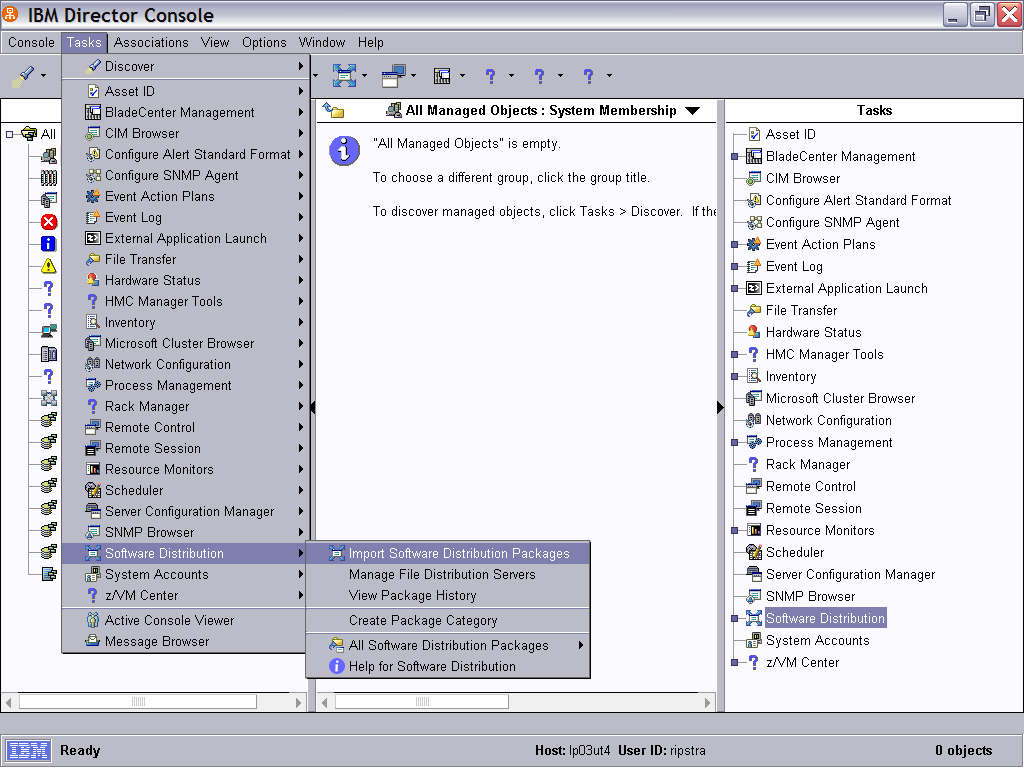
Figure 7: Import IBM Director Agent using Software Distribution.
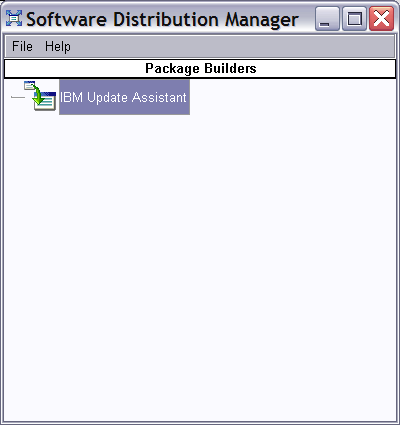
Figure 8: Choose IBM Update Assistant.
Double-click on the Update Assistant icon to display the panel shown in Figure 9.
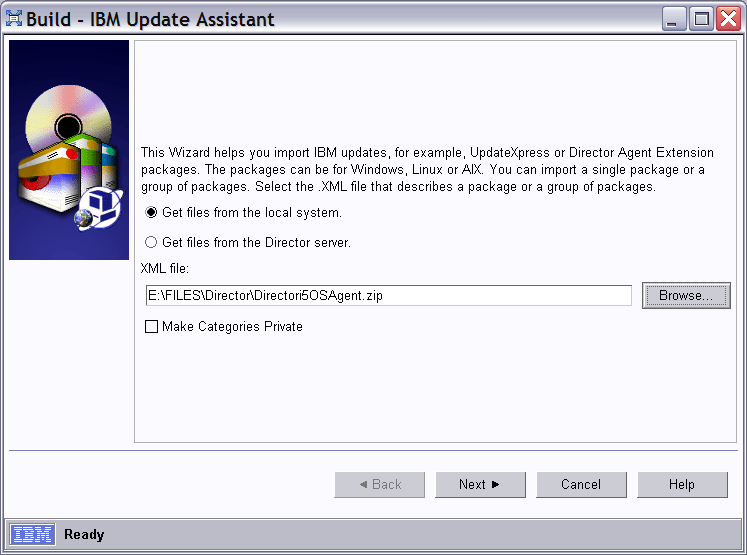
Figure 9: You now have the Update Assistant Wizard.
This will import a copy of the i5/OS agent image for IBM Director from the CD to your server, which can then be "pushed" to other System i resources running i5/OS in your network that you want to manage. The panel in Figure 10 will be displayed.
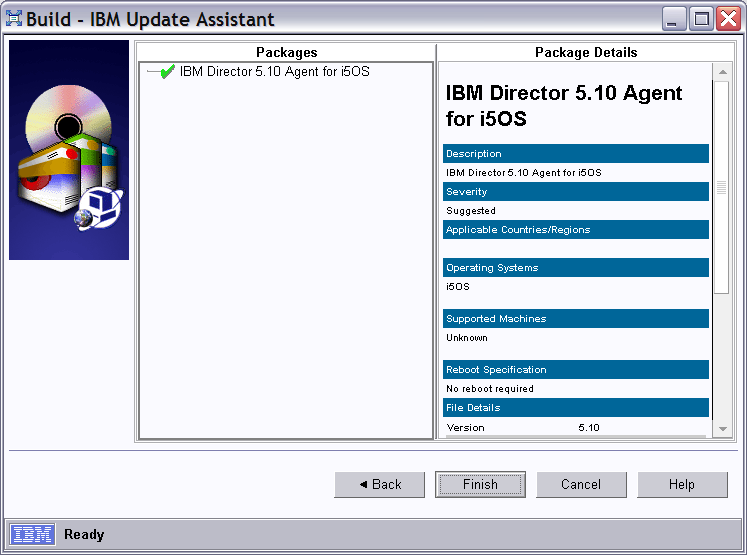
Figure 10: This is the final step of the Software Distribution import function.
Press the Finish button and you will see the agent listed under Software Distribution (Figure 11).
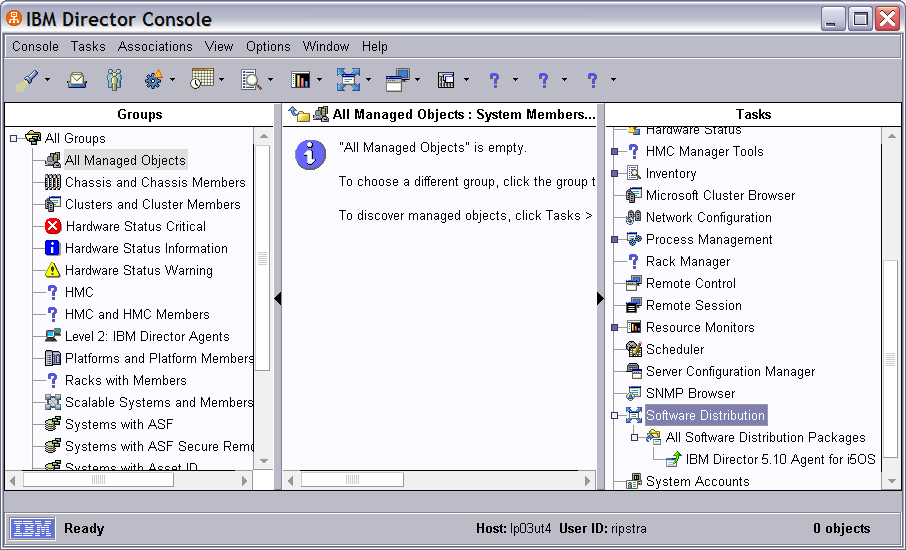
Figure 11: Your software package has been imported.
This package can then be dragged and dropped on any managed object that is running i5/OS. Similarly, other packages can be imported from the agent CD into IBM Director and distributed to System x, p, or z machines running Linux, AIX, or Windows.
The Software Distribution component can also be used to distribute other software shipped by IBM or other vendors when packaged correctly. This includes fixpack upgrades for IBM Director. In fact, you may want to download the latest fixpack from the IBM Director Web site and import and distribute it to your managed objects, where appropriate.
Once you have the IBM Director server, agent, and console installed, you are ready to start managing.
Note: To distribute the agent from your System i to another System i that does not currently have the IBM Director agent installed, you will need to have the SSH server up and running. To do this, you must install, configure, and start the SSH server, which is contained in LPP 5733SC1. Or simply follow the instructions on installing the agent.
The GUI
Although it can take a little time to get used to the IBM Director Console, it actually is rather simple. The groups in the left pane allow you to perform tasks on multiple systems at the same time. For example, you can right-click on the group named Systems with i5/OS and select Collect Inventory to force all systems that are in that group to begin collecting inventory (Figure 12).

Figure 12: Use Collect Inventory for a group.
Similarly, with the middle pane, you can right-click on a single system and select the task you want to perform for that system, as shown in Figure 13.
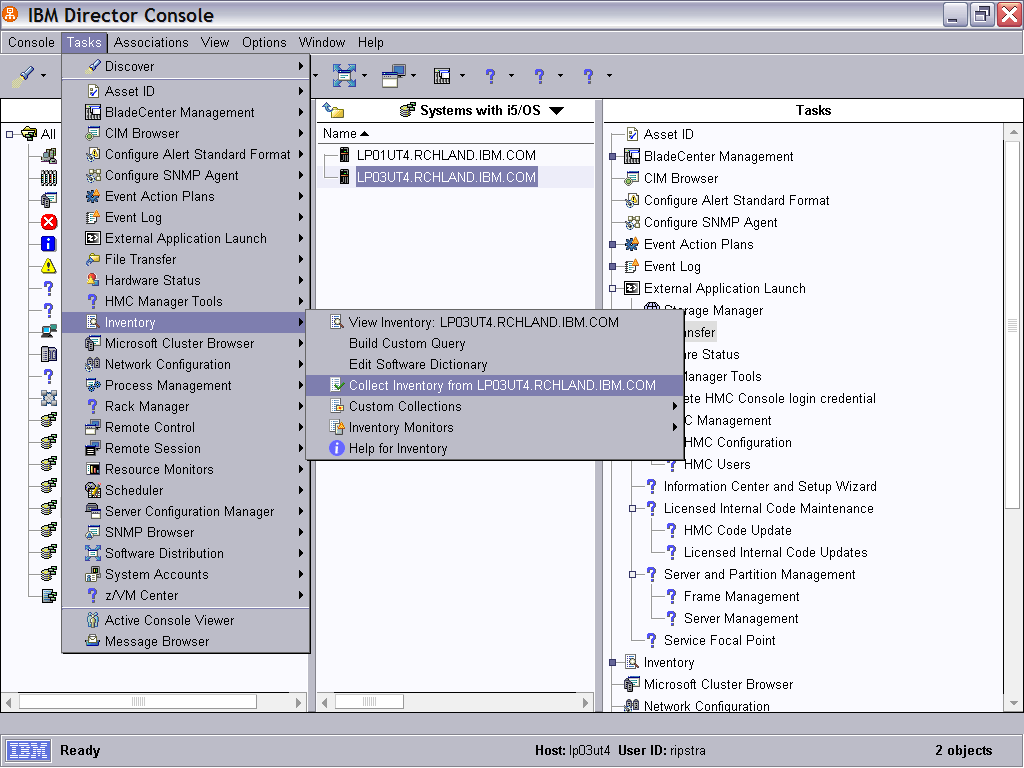
Figure 13: Use Collect Inventory for a single system via menus.
You can drag the task from the right pane and drop it onto the single system or a group on which you want to perform the task (Figure 14). You can also drag and drop a group or an individual system onto a task icon to perform the function.

Figure 14: Use Collect Inventory via drag and drop.
As you can see, the flexible interface allows users to determine which way is best for them.
Managing Resources
IBM Director provides many ways to manage the resources in your network. Here are some of the simpler ones to get you going:
- Event Log—Allows for viewing events that have occurred for a specific resource.
- File Transfer—Allows for simple transfers of files between your console, server, and agent resources.
- Inventory—Allows for the collection and/or viewing of what makes up one of the resources on your network. This includes hardware and software information.
- Process Management—Allows for managing jobs on i5/OS and processes on other platforms, such as Windows and Linux.
- Remote Control—Allows for taking control of systems running Windows.
- Remote Session—Allows for starting a Telnet session to a system.
- Resource Monitor—Allows for monitoring system resources to generate events, which can be handled using Event Action Plans.
- Schedule—Allows for the automatic start of tasks based on date/time.
- Software Distribution—Allows for distributing software, whether first-time install or upgrades of software across your network.
- System Accounts—Allows for managing user profiles on i5/OS and other platforms .
Let's go through a couple of examples. First, let's collect inventory for a System i running i5/OS. It is recommended that, prior to collecting inventory, you set up the server preferences using the menu option shown in Figures 15 and Figure 16. To ensure that you can view both software and hardware information, select All Available Data for levels 0, 1, and 2.
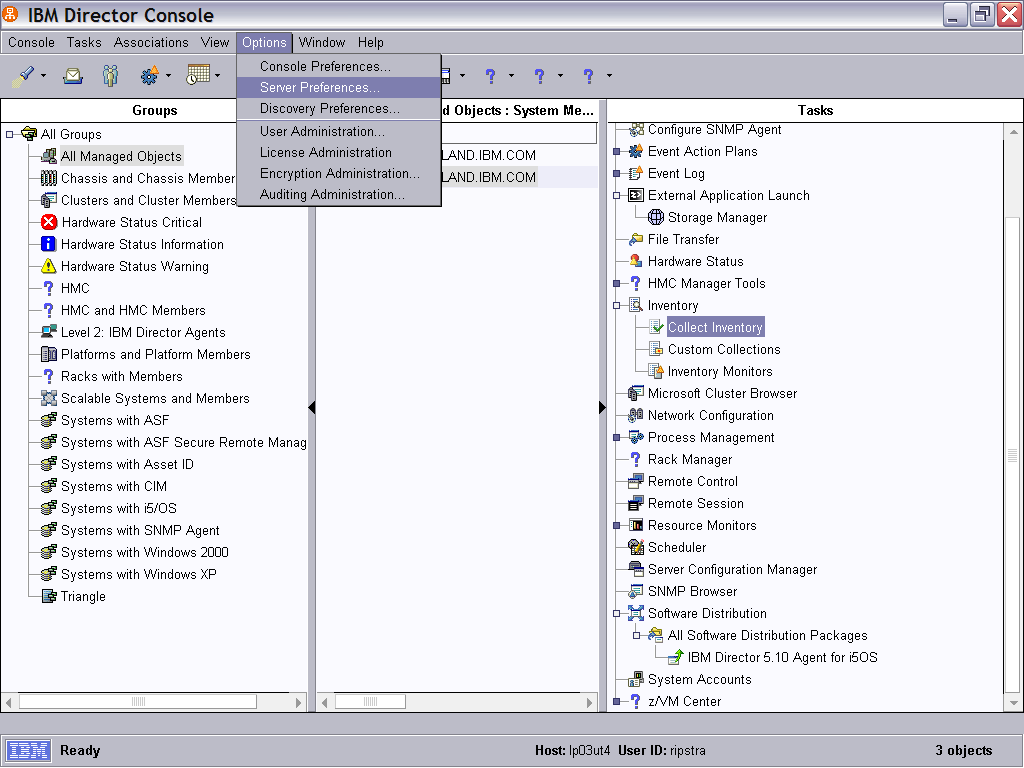
Figure 15: Set Server Preferences for Collecting Inventory.
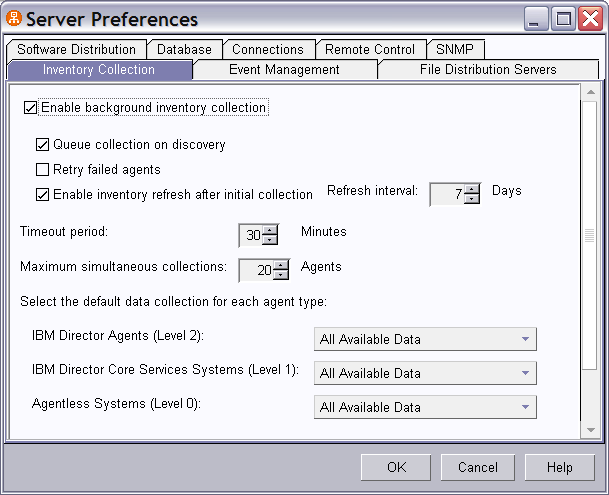
Figure 16: Finish setting Server Preferences for Collecting Inventory.
To collect inventory for a group of systems or an individual system, drag and drop the Collect Inventory task from the right panel to the group or system (Figure 17).
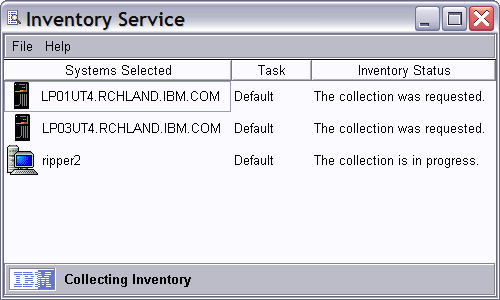
Figure 17: Collecting Inventory progress for a group of systems.
Inventory will be collected for each system. You can then either double-click on each system shown or use the right-mouse-button View Inventory task for the system in question. Click the Type triangle and select Type, which will show the various operating systems. Then, expand the i5/OS folder to view inventory that is relevant to i5/OS. The inventory is stored on the IBM Director server, which can be viewed from the console (Figures 18 and 19).
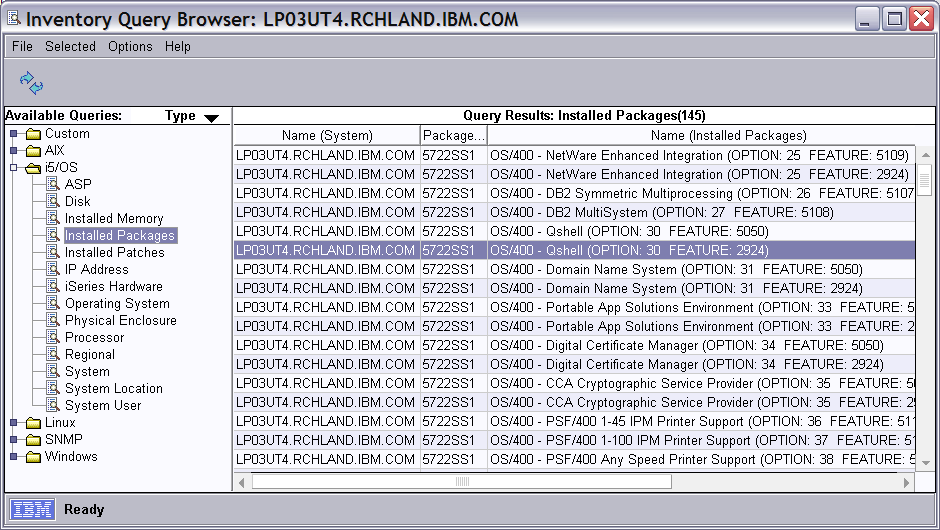
Figure 18: Here's your i5/OS inventory of installed packages.
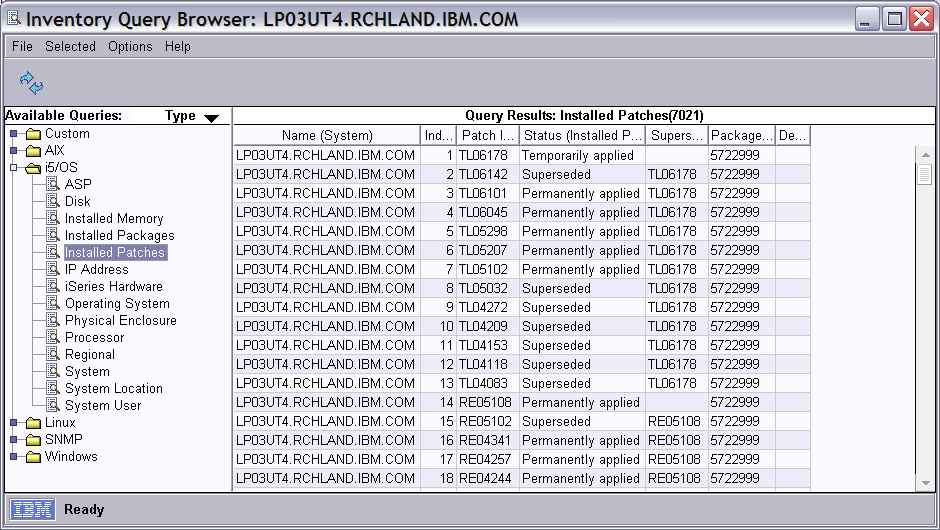
Figure 19: And here's your i5/OS inventory of installed patches.
To work with applications (i.e., jobs for System i), subsystems, and servers, you can simply drag and drop the Process Management task onto a system. The panel in Figure 20 will be displayed. From here, you can start and stop jobs, subsystems, and servers.
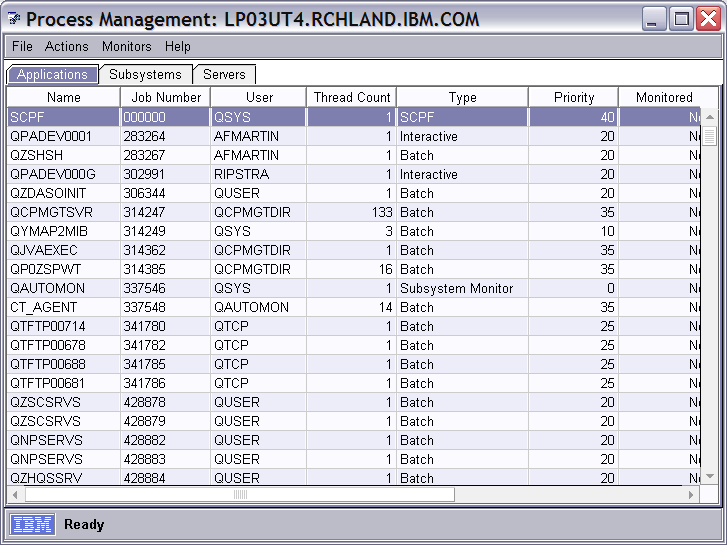
Figure 20: From here, you can manage i5/OS processes.
This article is just the tip of the iceberg when it comes to what you can do with IBM Director. There are many more advanced capabilities, like Event Action Plans, where you can monitor resources and take automated action based on events.
Additional information and downloads can be found at the IBM Director Web site and in a Redpaper on this subject.
So what are you waiting for? Dust off those Virtualization Engine CDs, install IBM Director, and get your feet wet in the warm waters of IBM Director on your System i.
John Ripstra is a Sofware Engineer for IBM in Rochester with over 27 years of experience with midrange systems. He currently works on IBM Director for System i and can be reached at This email address is being protected from spambots. You need JavaScript enabled to view it..


LATEST COMMENTS
MC Press Online