Like a lot of people, the thought of hooking an AS/400 up to the Internet sends chills down my spine. I can sit here and mentally imagine thousands of hackers trying to break into the system to access confidential data or do damage. There are a thousand and one questions to ask. Did I set my object authority correct on every single object on the system? Did I leave any profiles with access to a command line? Did I miss anything else?
The problem is that, in many cases, you want secure access to your production data, but only through predefined interfaces. How can you let customers order online if you can’t provide current pricing information and then store the completed order in your data files. There are a number of ways to solve this dilemma and I’m going to discuss one solution that I’m very excited about.
Microsoft recently began bundling its Internet servers, known as Internet Information Server or IIS, with Windows NT Server Version 3.51. If you own Windows NT 3.51, you don’t get IIS on your CD-ROM, but you can download it free from Microsoft’s FTP site. As I understand it, the Windows NT Server version 4.0 CD-ROM will include IIS. So using IIS can be a very cost-effective solution.
The trick is to figure out a way for a Web server, such as IIS, to communicate with DB2/400 using a protocol other than TCP/IP. If you aren’t using TCP/IP between your Web server and your AS/400, that makes it much more difficult for hackers to get access to your system. That’s what I’m going to describe in this article.
I’m going to show you how you can create a Web site that has very secure access to your AS/400 production data. My solution uses Microsoft’s IIS, Microsoft’s dbWeb, and a 32-bit ODBC driver. I’ve described IIS a little bit already. dbWeb is software that provides an interface between IIS and a number of other databases including those that
have a 32-bit ODBC driver available. I’m going to get this started by going into more detail on what each of those products are and what they provide in this solution.
What Is All of This and How Do I Get It
Here’s a list of the components needed to get this working:
• Microsoft Windows NT Server 3.51 or greater
• Microsoft IIS
• Microsoft dbWeb
• 32-bit AS/400 ODBC driver for Windows NT (for example, Client Access for Windows 95/NT ODBC driver)
• Web browser client (for example, Netscape’s Navigator) IIS is a series of servers that run under Windows NT. The servers include a gopher server, an FTP server, and a Web server. They’re independent services, so if you just need a Web server, you can run just that one.
There are a number of advantages to Microsoft’s Web server. One of the advantages being that if you’ve already paid for Windows NT, you don’t need to pay anything extra to get the servers. Another advantage is the tight integration with Windows NT. Another advantage is the performance of the servers included with IIS. Microsoft touts the speed compared to servers available from other companies.
Another benefit of using IIS is its support for Secure Sockets Layer (SSL). This is one of the standards that allows encrypted transactions to be passed. So you can create a site that supports online commerce, and feel more comfortable that unauthorized people won’t have access to your customers’ data. dbWeb is a free program from Microsoft that acts as an interface between IIS and ODBC databases and you can download it from Microsoft’s FTP site. Because there are 32-bit ODBC drivers available to access DB2/400 data, dbWeb works against AS/400 data. You can find 32-bit AS/400 ODBC drivers in the beta version of Client Access for Windows 95/NT, which you can download from IBM’s Web site, or you can use the driver bundled with Microsoft’s SNA Server. I’ve used them both and they’ve worked correctly.
The strength that dbWeb brings in this situation is that when you enable access to your AS/400 data, you create schemas. These schemas define what data can be access and whether that data can be accessed in a read-only mode or with the ability to update. So you defined access to specific files and hackers won’t be able to do anything else through dbWeb.
In Figure 1, you can see the structure of how all of the components work together. It starts with the IIS Web server running on a Windows NT system. A requests comes in from a client Web browser, such as Netscape’s Navigator. The request is formatted in a specific way to request dbWeb. The URL has a reference to the dbwebc.dll. This is the program that IIS runs to support requests for dbWeb. An example URL to access dbWeb is: http://www.acompany.com/scripts/dbWeb/dbwebc.dll/schema?getqbe.
The http://www.acompany.com is whatever your fully qualified domain name is where the IIS Web server is running.
The /scripts is the directory where you installed dbWeb into. By default, it goes into the IIS scripts directory.
The /dbWeb is the directory under the scripts directory where the dbWeb application is stored.
As I said earlier, dbwebc.dll is the dynamic link library that supports dbWeb requests.
You’d replace the schema portion of the URL with the schema that has the data that you want to look at.
The last part, ?getqbe, is the dbWeb command that you want to run. The getqbe brings up an HTML form that allows you to search for data using a query by example form. This is a very easy to use interface that you can see in Figure 2.
There are a number of other commands supported by dbWeb in addition to the getqbe command that I illustrated. These include commands to insert and update data, if the schema that you created supports that. You can see the additional commands supported by dbWeb in Figure 3.
So those are the components that you need to get this working. Now I’m going to go into more detail about the configuration of the components and how to get the most out of this set of tools.
How to Get All of This Running
I’m going to assume that you’ve installed and configured a number of items, because covering all of this would make this a book instead of an article. I’m assuming that you have Windows NT, IIS, and dbWeb installed. I’m also assuming that you’ve got a 32- bit ODBC driver installed, but I’ll cover some of the detail on how to configure the data source name (DSN.)
I’m going to start with the process of setting up the ODBC connection. The real trick to this step is to make sure you create a system DSN. A system DSN is used instead of a standard DSN when you want the DSN available to the system as a whole instead of just your current user. This allows the system to use the DSN even when you aren’t logged on.
In Figure 4, you can see the screen you use to create a system DSN. The first step is to bring up the 32-bit ODBC manager from the control panel. The top window shows the standard DSNs that are available. You need to click the System DSN button to have the bottom window displayed. This is where you create the system DSN. You need to click the Add button in the System Data Sources window, select the appropriate AS/400 ODBC driver, and create a data source just like you would any other. There’s no difference between the configuration of a system DSN and a standard DSN—you simply need to use the System Data Sources window.
The next step is to configure dbWeb to use your new system DSN and create a schema. In Figure 5 you can see the dbWeb administration program, which is where you accomplish this task. The first step when creating a new schema is to select the data source. In our case, you want to select the system DSN you created in the previous step.
Once you do this, you’ll see a list of files that you can allow access to. You need to select the files and fields that you want the users to have access to and what type of access they should be allowed. So you can limit the users to read only, insert only, update only, or a combination of those authorities. This is part of what creates the security of this scheme. The fact that you define only those files and access methods that you want available.
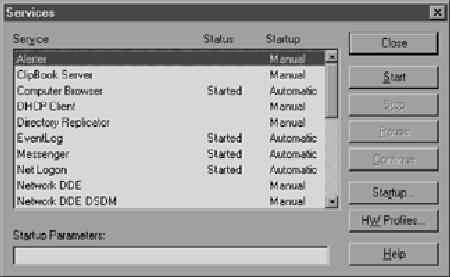
Once you’ve got a schema created, you need to make sure that the IIS and dbWeb services are started. This is done from the Services control panel application, which you can see in Figure 6. If you’re going to continue to use dbWeb and IIS, I recommend having those services start every time the system starts up.
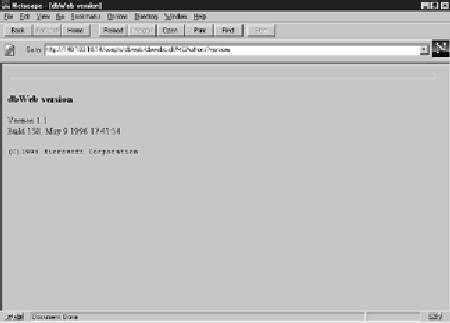
Now that you’ve got the services started, you’re ready to use dbWeb. One way to test to make sure that it’s working correctly is to use the version command. Here’s an example of the URL you’d use in this case: http://www.acompany.com/scripts/dbWeb/dbwebc.dll/schema?version. When you run this URL from your Web browser, you should see what’s shown in Figure 7.
The real power lies in coding the various dbWeb commands into your Web pages. You could create dynamic database requests using Common Gateway Interface (CGI) and Java programs. When a customer places an order, you could use the dbWeb insert command. If they want to change their contact information, you could use the dbWeb update command. Once you get the feel for how this works, move beyond the basic QBE form I showed you earlier.
The Next Step
As you’ve seen, combining Microsoft’s IIS and dbWeb to access your AS/400 data can provide flexible, cost-effective, and most importantly, secure interactions with your customers and users. This is a way that you can give your customers the access to the data they need, but not present a serious security exposure.
If you’d like to learn more about IIS or dbWeb, check out Microsoft’s Web page at http://www.microsoft.com. Go ahead and download dbWeb, after all, it’s free. Read through the help text provided with dbWeb and learn more about the various commands dbWeb supports. If there’s enough interest, I’m sure we’ll continue to cover this solution in even greater detail in the future.
Figure 1: The Structure of IIS, dbWeb, and the AS/400
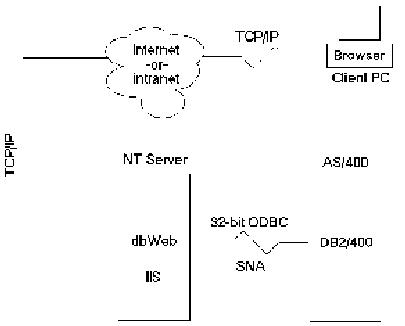
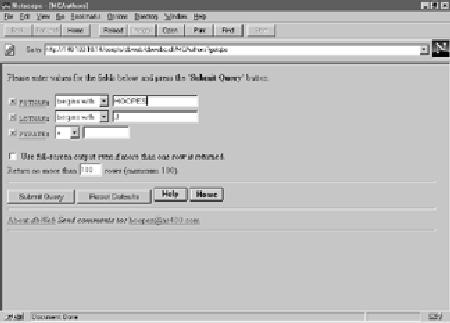
Figure 2: dbWeb’s QBE Interface Figure 3: Commands Supported by dbWeb
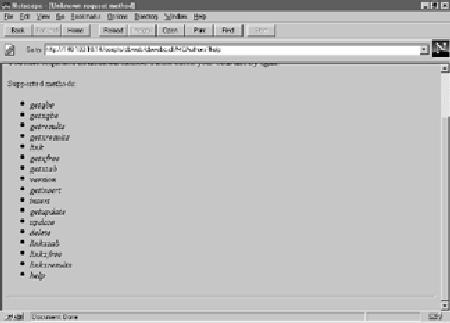
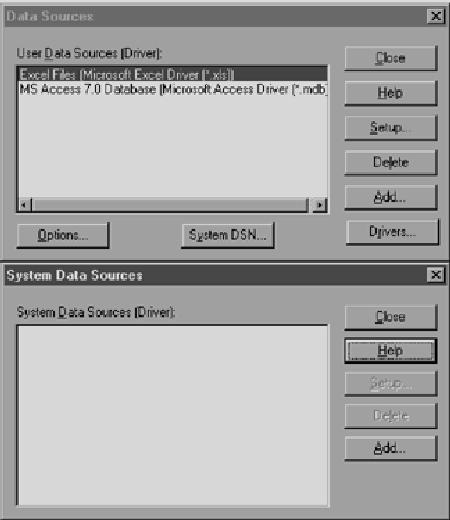
Figure 4: Creating a System DSN
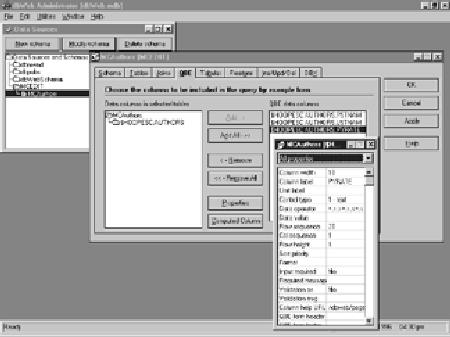
Figure 5: The dbWeb Administration Program Figure 6: The Services Control Panel Applet Figure 7: Using the Version Command to Verify dbWeb is Working


LATEST COMMENTS
MC Press Online