In my last Linux Letter, I examined some of the methods you can use to exchange data between the iSeries and your Linux desktop computer. Among the methods that targeted iSeries database connectivity were the ubiquitous Java Database Connectivity (JDBC) and Open Database Connectivity (ODBC) drivers. This month, we'll look more closely at these two database access methods and discuss how to put them to work.
JDBC
Let's start with the simplest solution first: JDBC. If you are writing your software in Java (such as server-side Java hosted within Tomcat and JBoss servlet and EJB containers) or if you are using a program that can access databases with a JDBC driver (such as Sun's StarOffice office productivity suite), then you have a quick and easy task in front of you. An executive summary of the task goes like this: 1) obtain a JDBC driver for the target database, 2) copy the JDBC driver somewhere into your Java classpath, and 3) use it.
You have two sources for the iSeries driver. The first is on your iSeries. The JDBC driver is included in the IBM Toolbox for Java (Licensed Program Product 5769-JC1). If you have that LPP loaded, then you'll find the file jt400.jar in the Integrated File System (IFS) in the directory /QIBM/ProdData/HTTP/Public/jt400/lib. Simply copy that file to your Linux system via any of the means discussed last month and include jt400.jar in your class path. (Look in future issues of MCMagOnline for articles about IBM Toolbox for Java by IBM's own Robb Wiedrich.)
If you don't have 5769-JC1 loaded, you can obtain the driver from the second source, the open source JTOpen Web site . Follow the links to the download page and choose either the JTOpen version (the download weighs in at a hefty 17Mb) or the LPP version (which is an even heftier 24Mb download).
I'm not going to venture further into JDBC in this article because your choice of operating system is irrelevant. Java was designed to be portable; thus, the information that is available in any one of the plethora of JDBC articles is applicable to JDBC on Linux. I don't need to duplicate that information here. Details about JDBC can be found on Sun's Java Web site and on any number of IBM's Web sites, including the aforementioned JYOpen Web site.
UnixODBC
If you aren't writing Java software or if you are using a program that requires ODBC for database access, then your task is a bit more complicated. Whereas JDBC provides the simplicity of "one size fits all operating systems," ODBC requires two components. (Technically, there are more than two, but I'll group the management components as one for simplicity.)
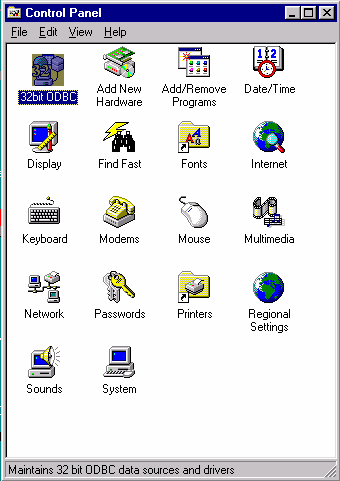
The first component is the ODBC Driver Manager, which is required for any operating system that provides ODBC data sources. On a Windows machine, the manager is located in the control panel (shown in Figure 1).
Figure 1: The Windows ODBC Manager is found in the Control Panel, as shown in this Windows 95 machine.
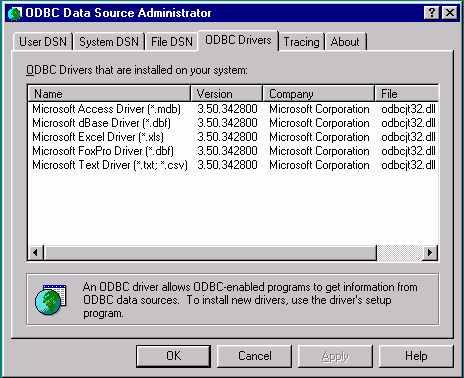
The purpose of the manager is to provide a catalog of ODBC drivers (which I'll discuss shortly), the data sources that you create via the manager, and standard program APIs that client programs use to access ODBC data sources. Double-clicking the 32-bit ODBC icon (highlighted in Figure 1) starts the manager (shown in Figure 2). Prior to running the screen capture for that figure, I clicked on the "Drivers" tab to illustrate the second component of ODBC, the database driver.
Figure 2: The Windows ODBC manager in action.
The ODBC database driver is a piece of software written either by the database supplier, as in the case of closed-source database management systems (DBMS), or by anyone, as in the case of open-source DBMS, such as PostgreSQL or MySQL. The ODBC database drivers provide the interface between the ODBC driver manager and the proprietary, low-level APIs required by the DBMS.
Although this dual-component system is more complicated for the system manager (that's you) to install than is the JDBC system, the result to the application programmer or end-user wishing to access a database is the same: It provides a greater level of database independence.
Parts Is Parts
Now that I've discussed the components of ODBC, you need to gather up the parts necessary to ODBC-enable your Linux machine.
To begin, you need to obtain an ODBC Driver manager. As you probably can guess, there is an open-source project titled "unixODBC." You may find that you have the manager included with your distribution; you'll have to check. I know that the latest version of Red Hat Linux (Version 7.3) includes the complete manager in three Red Hat Package Manager (RPM) files. What I found peculiar is that the workstation installation loaded only two of the three. The third RPM, which provides the actual human GUI interface, wasn't installed. This makes no sense, since doing everything by hand to edit the config files can be error-prone. (Hint: If you are using RH 7.3, ensure that the package unixODBC-kde is loaded via the following command: rpm -qa | grep unixODBC.)
If you find that your distribution is devoid of unixODBC, you can point your browser to the project's home page and download binaries from there. If there isn't a pre-built package available for your distribution or flavor of Unix, you can always download the source and compile it yourself. (Complete instructions for this are available on the unixODBC download page, so I won't repeat them here.)
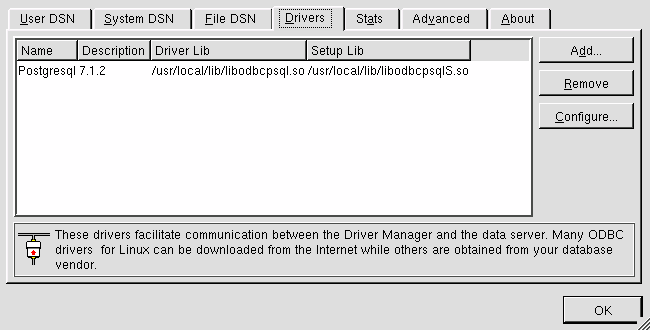
Once you have unixODBC downloaded and installed, you should be able to open a terminal session and type this command: ODBCConfig. If all is well, you'll be rewarded with what is shown in Figure 3. Keep in mind that you'll need to be signed on as root to be able to install any drivers or to configure systemwide data sources. If you are signed on as a mere mortal (which you always should be when not performing system maintenance), the only data sources you can configure are user-specific. This limitation parallels that of the Windows NT/2000/XP ODBC manager.
Figure 3: The unixODBC manager looks hauntingly familiar.
Now that the requisite ODBC manager is installed, you need to turn your attention to obtaining and installing the iSeries ODBC driver. IBM conveniently provides a comprehensive Web site from which you can get the driver as well as the installation and configuration instructions. Be sure to choose the driver for the Intel platform (IBM also provides a PowerPC version for instances of Linux on OS/400) and install it per the instructions accessible from the download page.
In the case of a Red Hat client, IBM's system will automatically provide you with links for an RPM version. (I assume that they provide tar files or deb packages for other distributions, if you connect to their site from something other than Red Hat, but I can't confirm that since I don't have any other distribution currently loaded.) For a Red Hat system, installation is as simple as issuing a command: rpm -Uvh iSeriesODBC-5.1.0-0.xx.xxxx.rpm (changing the "xx.xxxx" to match the actual file name you downloaded) while logged on as root.
One problem that I encountered while installing the package on my RH 7.1 laptop was a dependency failure. When I initially attempted to install the package, I received the following error message:
error: failed dependencies:
libodbcinst.so.1 is needed by iSeriesODBC-5.1.0-0.12
This was because I had originally installed unixODBC from source instead of using an RPM. As a result, rpm was unaware that the library was loaded. To sidestep that dependency, I used the "--nodeps" (note the double-hyphen) option to rpm. That solved the problem, and with the completion of the rpm command, my drivers list in the ODBCConfig manager included the iSeries, as shown in Figure 4.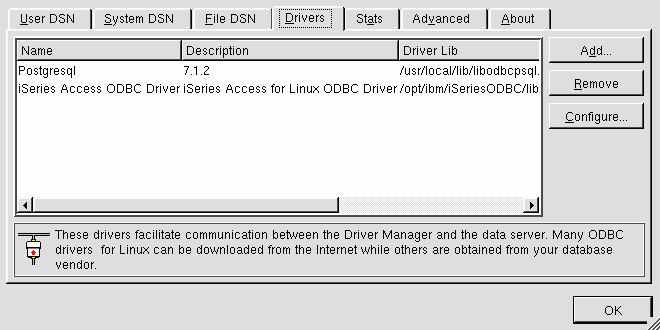
Figure 4: The ODBCConfig manager drivers list, after the installation of the iSeries driver.
Configuring a Data Source
The final step is to configure a data source and test for connectivity. This task assumes that you already can connect to the iSeries via ODBC from either a Windows PC or another Linux PC. If not, the requirements and configuration for the iSeries are beyond the scope of this column, so you'll need to consult the appropriate IBM documentation for those steps.
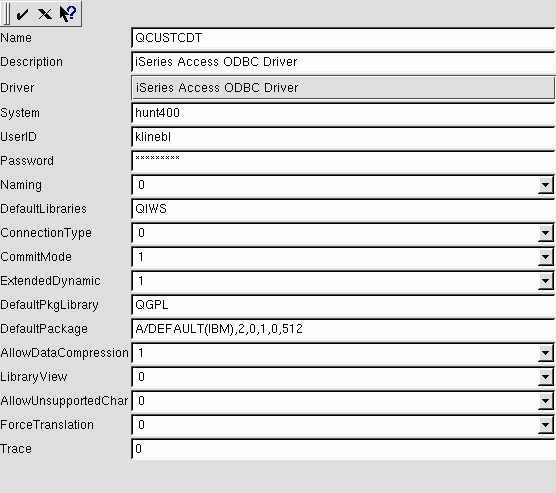
Start the ODBC manager by entering a terminal session and entering the command ODBCConfig. You're going to test your connection by creating a data source called QCUSTCDT and using IBM's data file QIWS/QCUSTCDT as your guinea pig. Click on the User DSN tab, then the Add button. Select the driver iSeries Access ODBC Driver and then click OK. Fill in the dialog box as done in Figure 5 (you'll have to provide the correct System, UserID and Password entries); then, click the check mark icon to save and exit.
Figure 5: This dialog box is used to configure a data source.
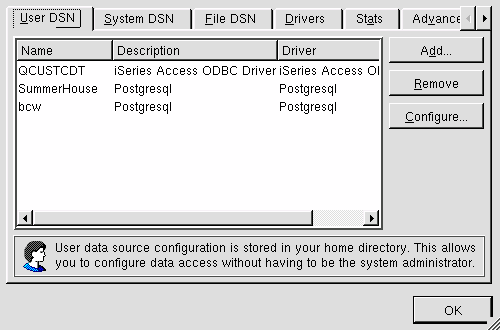
If you are now looking at a screen that resembles Figure 6, you're good to go. Click the OK button to close the manager.
Figure 6: This shows that our test DSN was added successfully.
Taking a Test Drive(r)
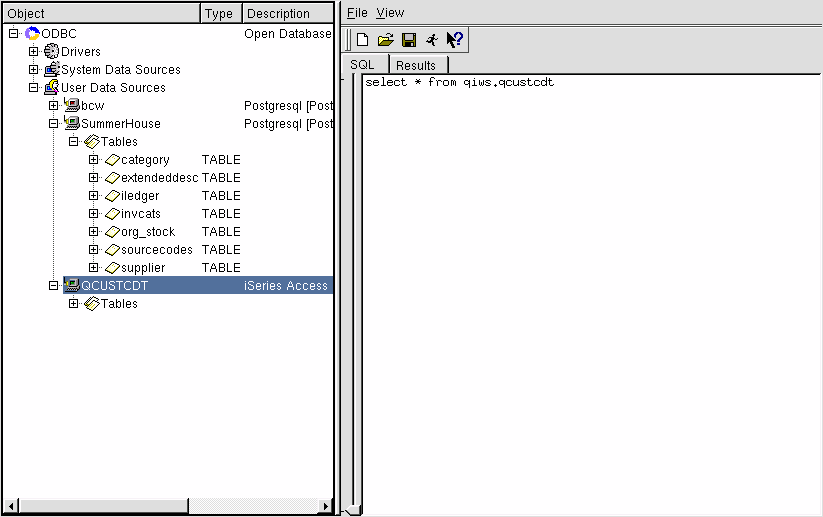
At this point, you should be able to talk to your iSeries. As a test, issue the command DataManager from a terminal session. Once the program has started, expand the object ODBC, and then expand User Data Sources (by clicking on the plus sign beside each object). Next, locate and double-click on the data source that you just created. You'll be prompted for your user ID and password. Next, single-click on the same data source name and you'll be looking at a screen that resembles Figure 7.
Figure 7: The SQL query screen, filled out with a simple query for QCUSTCDT.
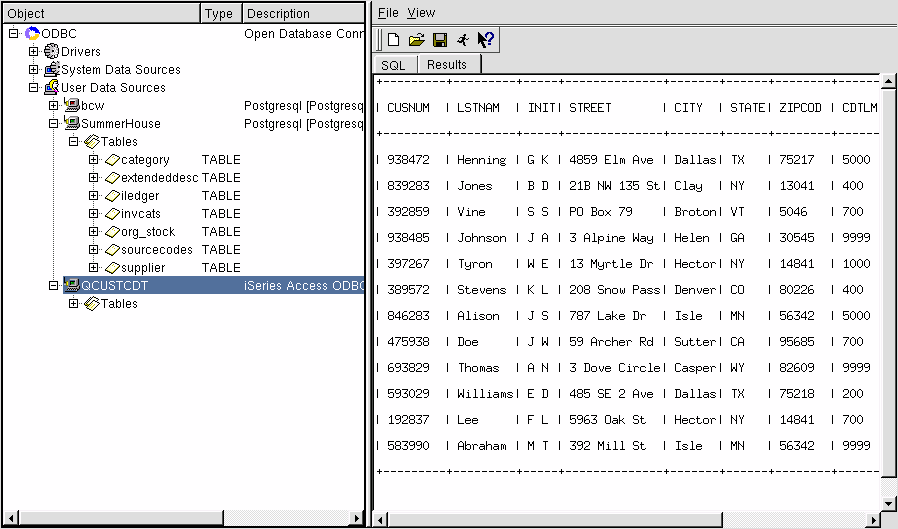
Fill in the SQL form as shown, then click on the "Runner" icon to execute the query. In short order, you should be looking at a screen similar to Figure 8.
Figure 8: Success!
The only vagary I have found with the DataManager appears if you expand the "Tables" object under an iSeries data source. The first attempt invariably gives an error ("Failed to SQL Tables"), but I find that if I collapse the entry and try again, it works the second time. I'm currently running on OS/400 V4R5 and haven't taken the time to investigate the source or solution to the problem, since it is so miniscule. The anal-retentive among you may want to do some additional research along those lines and, indeed, V5R1 may have the solution built in already. For me, it would be time ill spent.
Odds and Ends
As you can see, there's nothing difficult about configuring your Linux box for ODBC. If you know how to configure ODBC on a Windows machine, your knowledge and skills will transfer to Linux quite well.
Assuming that everything went as described, you're probably wondering what you can do with this new-found connectivity. That will be a subject for next month's missive! Until then, keep those emails coming!
Barry L. Kline is a consultant and has been developing software on various DEC and IBM midrange platforms for over 20 years. Barry discovered Linux back in the days when it was necessary to download diskette images and source code from the Internet. Since then, he has installed Linux on hundreds of machines, where it functions as servers and workstations in iSeries and Windows networks. He recently co-authored the book Understanding Linux Web Hosting with Don Denoncourt. Barry can be reached at This email address is being protected from spambots. You need JavaScript enabled to view it..


LATEST COMMENTS
MC Press Online