In this first of a series of tips on plug-ins for WDSC, I'll introduce you to the ARCAD emulation plug-in.
Until recently, I didn't do much with plug-ins in WDSC. I use the base package extensively, but I don't mess with non-IBM stuff for a number of reasons. My biggest reason was that I didn't like to incorporate third-party software of unknown stability into a framework that was working out its own kinks. That particular reason is less of an issue now, not only because WDSC itself has gotten so much more stable but also because the plug-ins I'll be mentioning have been around for some time and have gained good reputations.
This first one, in fact, is used by a lot of people who either don't want to go through the exercise of installing iSeries Access for Windows or who want to have some sort of green-screen capability as part of WDSC. This is a reasonable requirement; after all, some commands (think WRKACTJOB) simply can't be executed in WDSC. And while lighter-weight alternatives to iSeries Access exist (such as TN5250), many people don't like having to navigate out of the IDE just to run a quick interactive command.
So the fine folks at Arcad Software have created a plug-in for WDSC that will allow you to add a 5250 session as a view to WDSC. Getting the plug-in is relatively easy and non-obnoxious; they hit you up for a valid email address and some cursory information, and then they email you a link to get to the actual download page. You'll get a zip file that you then have to install.
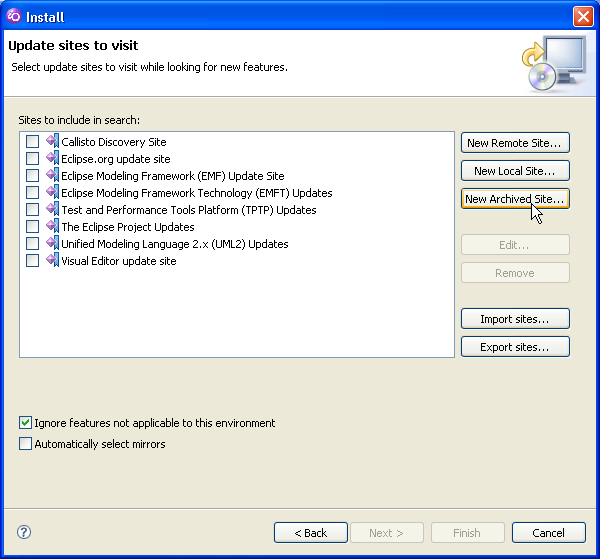
During the installation process, I learned one time-saver that I can pass on to you. The notes in the email say to unzip the zip file into a temporary folder, but with WDSC 7, there's no need for that. When you launch the installation wizard (using menu option Help / Software Updates / Find and Install...), you can select the option New Archived Site as shown in Figure 1.
Figure 1: Select New Archive Site to install directly from a zip file. (Click images to enlarge.)
Then, simply navigate to the folder where you downloaded the zip file from Arcad and select it, as shown in Figure 2.
Figure 2: Navigate to the downloaded zip file, select it, and click Open.
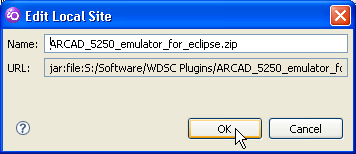
Press Open, and the Edit Local Site dialog appears, as shown in Figure 3.
Figure 3: The defaults should look like this.
The defaults should appear as shown in Figure 3. Hit OK and proceed with the rest of the installation process. The installation wizard walks you through a number of additional screens that we don't have room for today, but once you're done installing (and restarting the workbench), you're ready to use the plug-in.
This next part I found a little counter-intuitive. The emulator is set up as an editor, which means it can appear only in the editor view. You must first set up a project, and then, within the project, you create the emulator session. Finally, you open the session, and the emulator view appears in your editor window. (I'll show you that in a moment.)
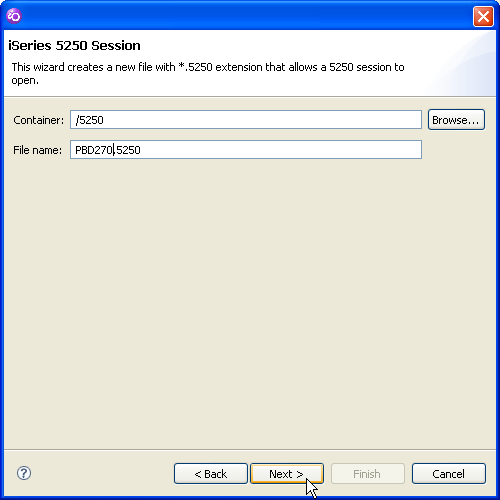
Figure 4: You can give your session a meaningful name when you create it.
One suggestion: During the creation wizard, a dialog will appear (shown in Figure 4) that will have the name "new_session.5250" predefined. This is the name that will appear in your project; now is a good time to rename it to something meaningful (such as the name of the machine you will be connecting to).
Using the emulator is straightforward, even if it is a little clunky at first. Remember, this is an editor inside a project, and if you're using just the Remote Systems Explorer (RSE) perspective you won't even have a Project Explorer view. You'll need to open that view (using Window / Show View... and then searching for Project Explorer). You'll need to add this permanently to your RSE perspective if you plan to use it regularly.
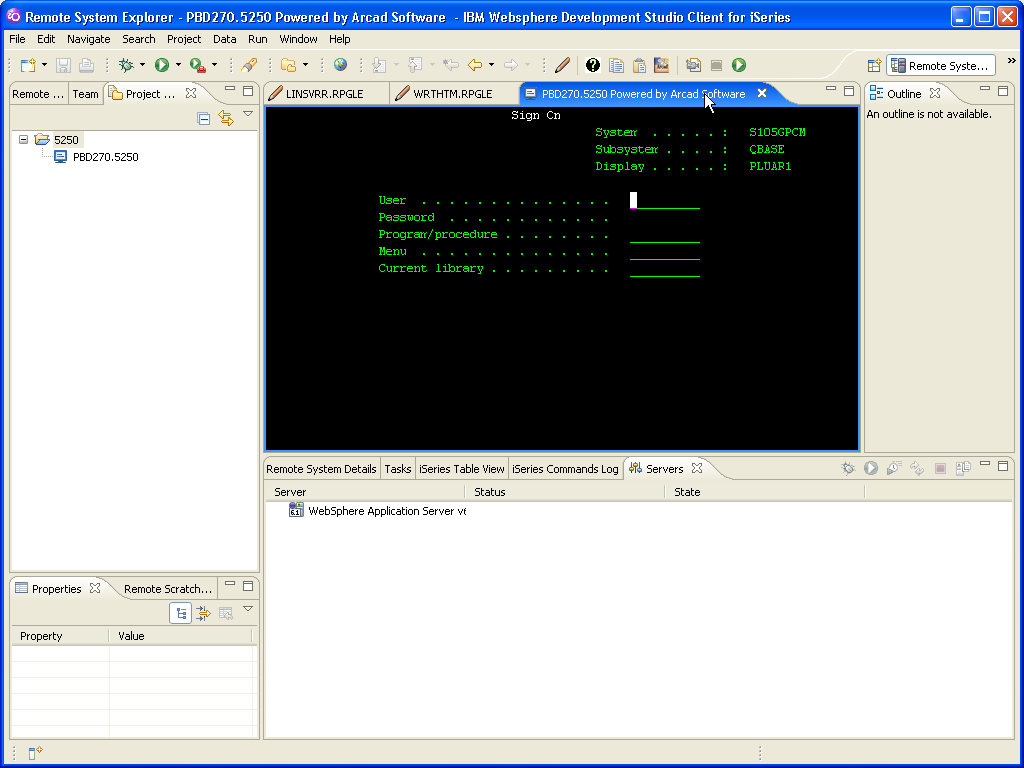
Figure 5: The emulator shows up as an editor.
Figure 5 shows what happens when you open the emulator. You'll see it pop up on top of your source code as an editor. It's sort of small in Figure 5 because that's the default RSE layout, which isn't optimized to use as much workbench real estate as possible. (I showed you how to do that in one of my video tutorials.) Since it's an editor, you can always double-click on its tab to maximize it.
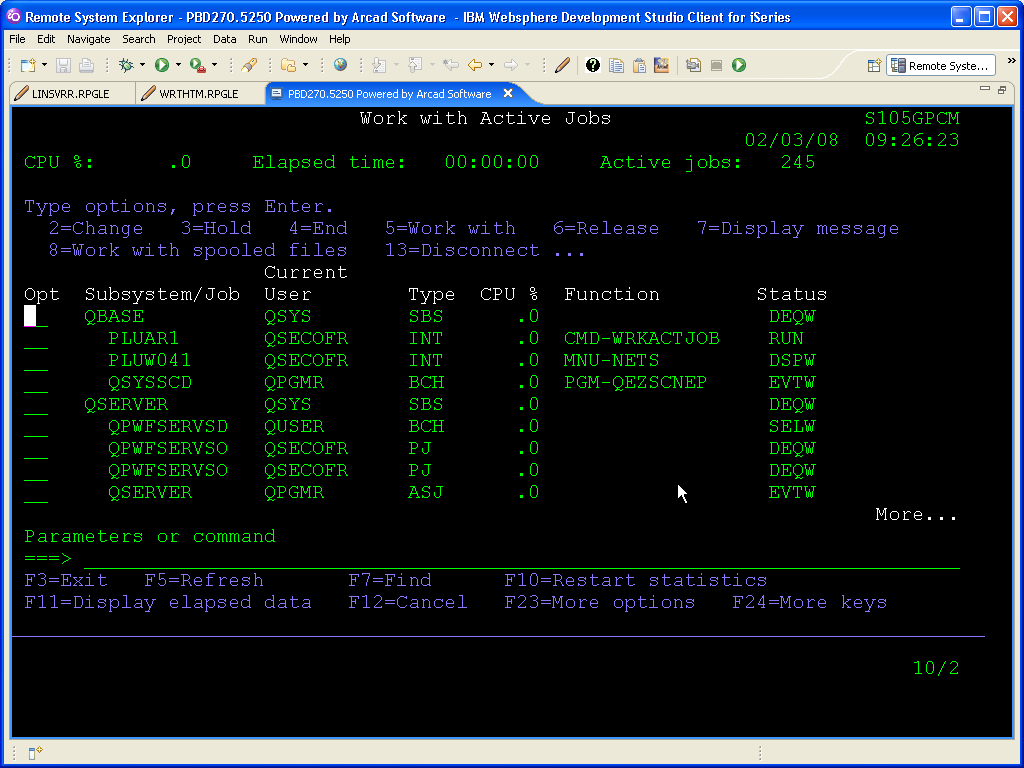
Figure 6: Here's the emulator maximized.
And if you're really looking for punishment, and you have enough screen real estate, you can even show them side by side, although I'm not sure you'd ever want to do that.
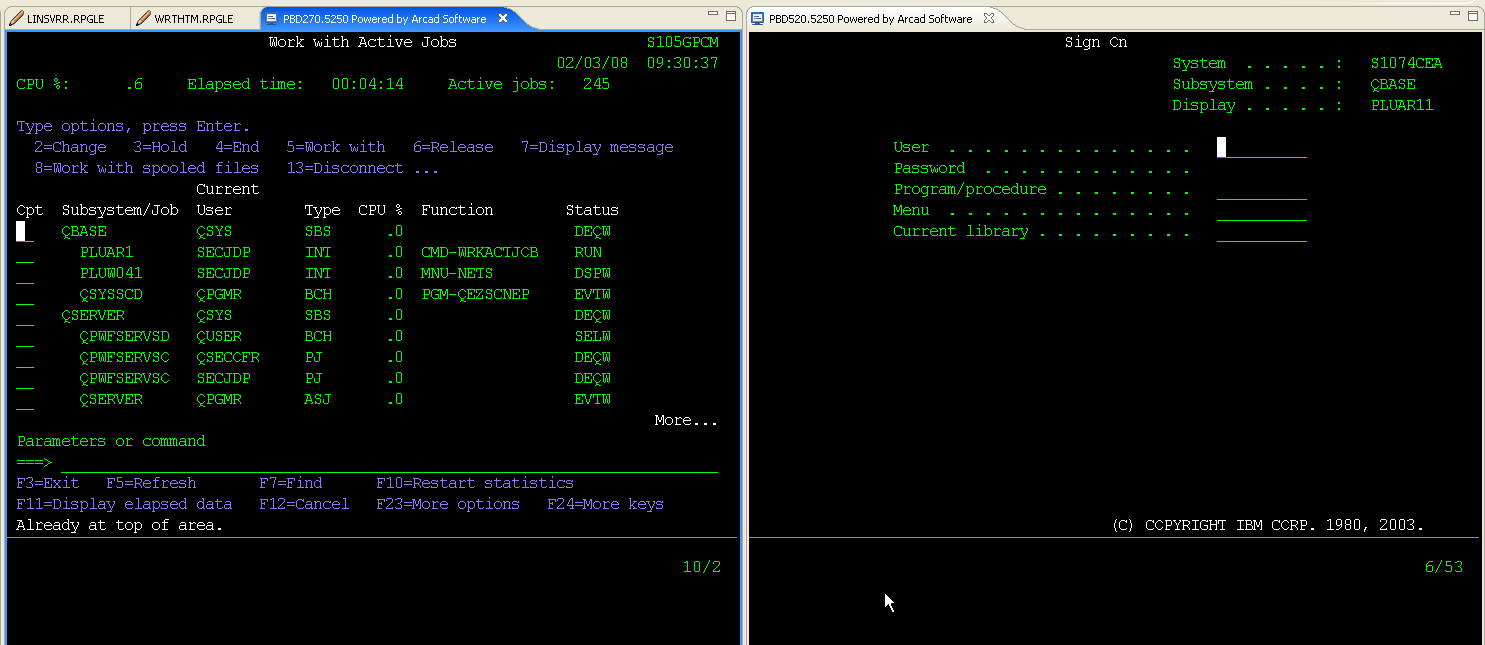
Figure 7: Now you have two emulators side by side.
The plug-in is functional and does what it needs to do. I personally found the invocation a little clunky; I think I'd prefer to right-click on the connection object and fire up a session. I'd also prefer that it wasn't in an editor view but instead in a completely separate view, but I think that's also a personal preference that doesn't really affect the usability. What does affect the usability is that I don't think there's a way to copy and paste either into or out of the emulator session. That's an almost fatal shortcoming for me because I use cut and paste all the time with iSeries Access.
There are small annoyances as well. The emulator doesn't always select the right font size, so the bottom of the screen is lopped off. F1 works, but it also brings up the WDSC Help view. But all in all, if you're looking for a nice option for a 5250 emulation plug-in, this one is a good one.
Note: This plug-in hasn't been tested with RDi yet, since nobody has a copy. And while I hope it works, there's a chance that some functionality of WDSC may be left out of RDi that is essential to the Arcad plug-in. We'll have to wait and see.



LATEST COMMENTS
MC Press Online