Learn Microsoft from the perspective of an RPG developer. Develop C# Web Applications using Visual Studio 2012.
Being a code junkie, I'm thoroughly enjoying all of the career changes I've been experiencing over the past few years, and fortunately I was able to work with some amazing people along the way. Upgrade that to being fortunate enough to be a writer for MC Press; having the opportunity to share these perspectives is a genuine treat. I have a lot of goodies to share in my new bag of tricks, but I have to get beyond the building blocks first. In this article, I'll cover how to add the Visual Studio IDE to your Developer toolbox and take it for a test drive with a simple web application.
We'll be installing Visual Studio 2012 Express, which is the latest and greatest C# Integrated Development Environment (IDE). Visual Studio is the de facto standard among C# developers. C# (pronounced "C Sharp") is the most popular programming language with Microsoft developers and is the successor to Visual Basic. C# is extremely similar to Java, and that's another topic in itself. The point is that if you learn one, you can easily transition over to the other. What I really enjoy about C# is that once you start playing with the code for applications, you can also those C# skills to use ASP.NET for your website development.
Download Microsoft Visual Studio 2012 Express
There are a few versions of Visual Studio Express available: one each for Applications, Web, and Mobile development. For this article, I'll be covering how to install the Visual Studio Express 2012 for Web version.
You can download Visual Studio Express 2012 directly from Microsoft. You can install directly from the website using the Web Platform Installer (Web PI), or you can download an ISO to burn to disk.
Prior to the installation (I chose the Web PI installation), the installer will check for any prerequisites that are needed on your computer.
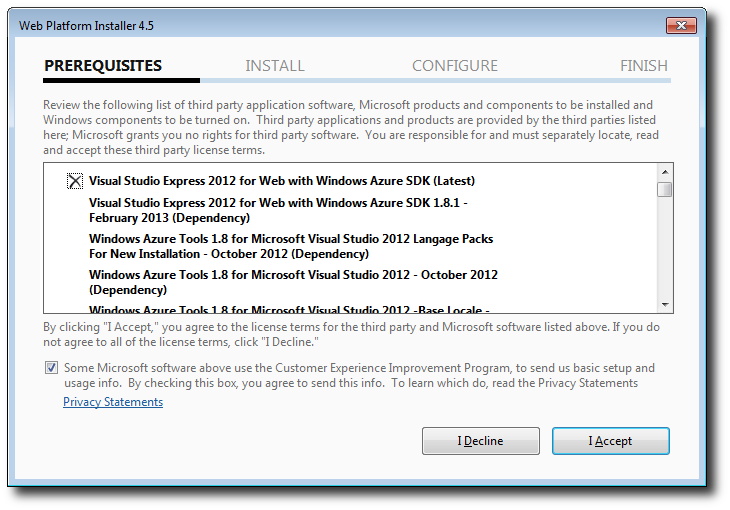
Figure 1: This is the Microsoft Visual Studio Express 2012 prerequisites list prior to installation.
During the installation, the installer automatically installs quite a few components, including the Microsoft Web Server Internet Information Services (IIS) 8.0 Express.
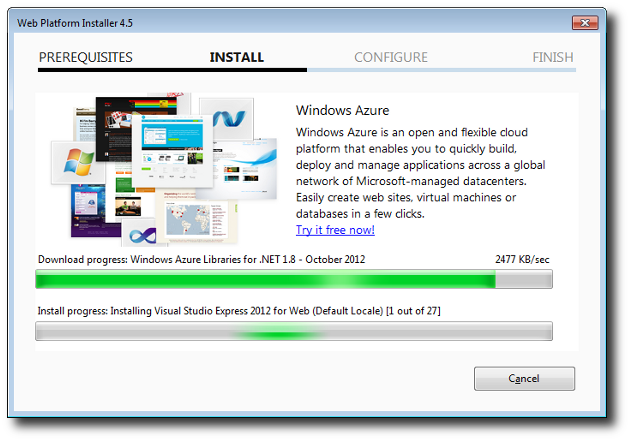
Figure 2: Monitor the progress during the installation.
Upon successful completion of your Visual Studio installation, you will most likely receive a notification telling you that updates for Visual Studio are available. You may as well install those while you're at it.
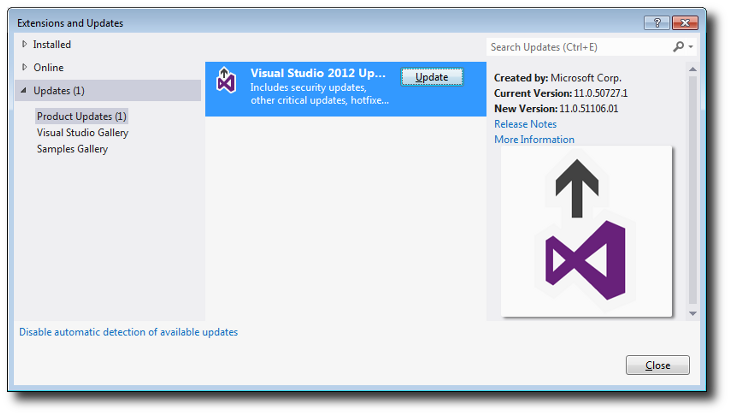
Figure 3: Apply your updates.
Now your installation is complete and up to date with the latest and greatest Microsoft development tool. After my experience with installing the IBM Rational Application Developer (RAD) tool for the IBM i, this seemed like a piece of cake.
My First Microsoft MVC Web Application
With Visual Studio installed, you can start to work on your first web page. You could create just a simple HTML page, but we're going to do much more by taking advantage of the MVC 4 framework that's provided with Visual Studio 2012.
To create your web application, click on File > New Project. You'll be presented with the following options:
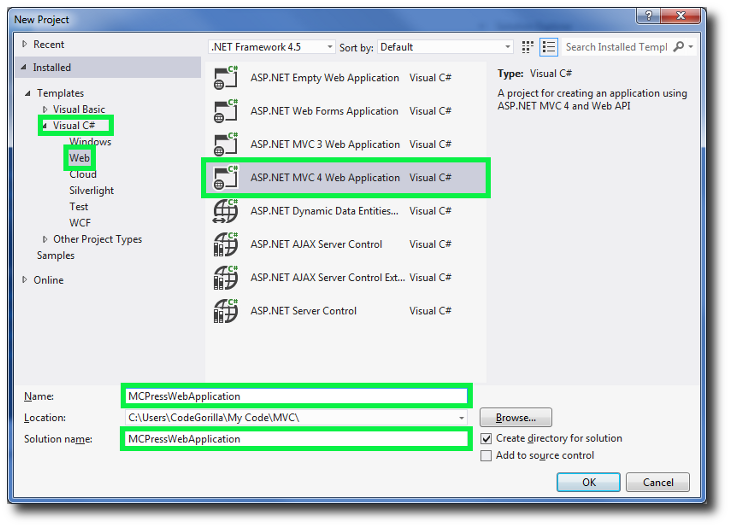
Figure 4: Create your first Microsoft Web Application with the MVC 4 framework.
We'll be using the "Visual C#" Template. Under the "Web" option, we'll select "ASP.NET MVC 4 Web Application."
On the bottom of the screen, enter the "Name" of the project and the "Solution name." Then click the OK button.
On the next screen, we get to select how we'll be building our Web Application. For our example, we'll create an Internet Application using the Razor View Engine. Automatically setting up Unit Testing is a good practice and does not interfere with your coding. But when you're ready to use it, it will be there for you.
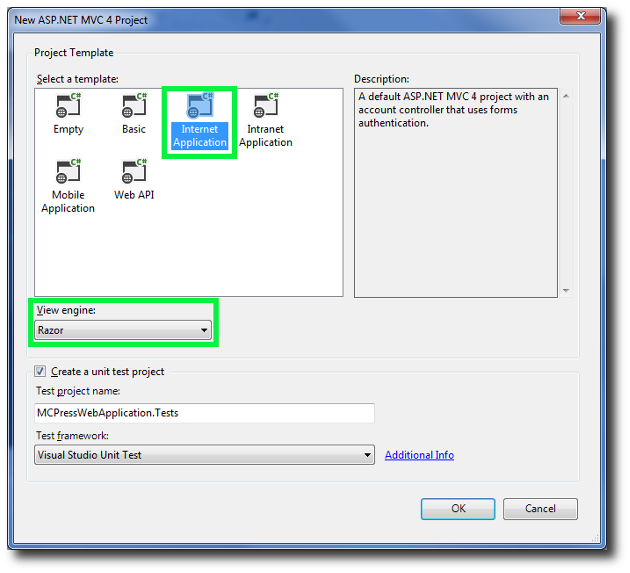
Figure 5: Use Razor and Unit Testing for your Internet Application.
When you click OK, Visual Studio will create your project to include the MVC framework files and also initialize the configuration settings and create the default styling for your site. The HomeController.cs file will default to be your open-source code file that could be the beginning of your changes to the site.
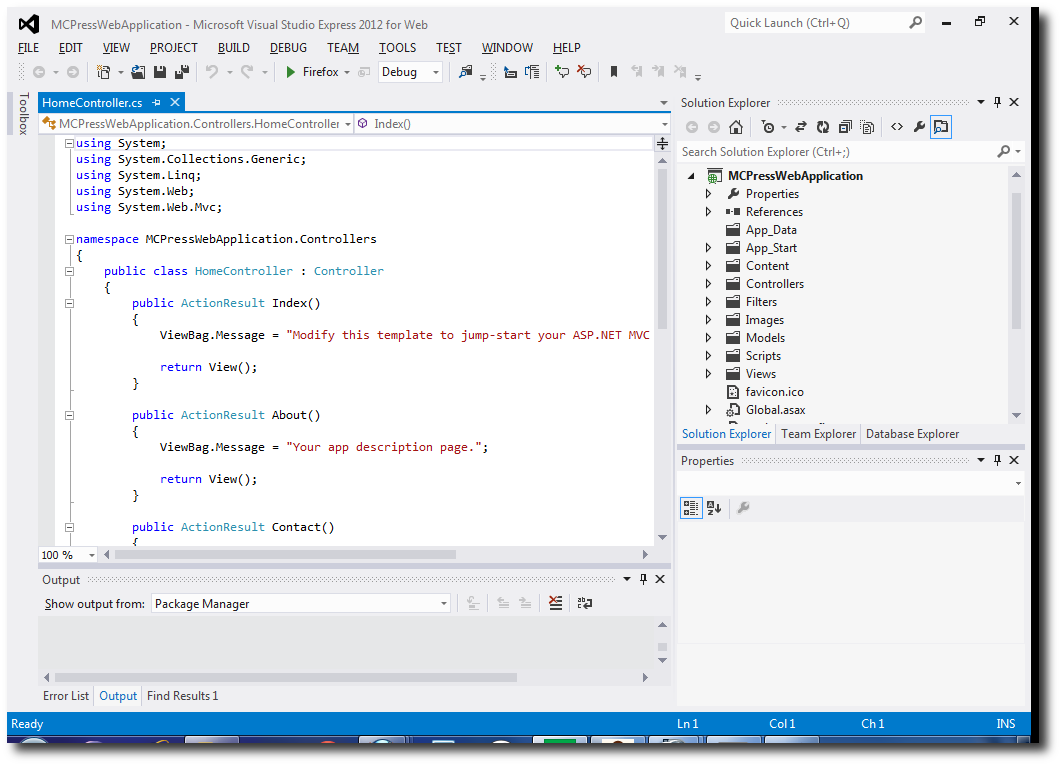
Figure 6: The framework code is automatically created for an MVC 4 C# Web Application.
Without writing a single character of code, you can view your newly created website that will be running locally on your computer by clicking on the "DEBUG" menu bar option and selecting "Start Debugging." You could also use the F5 key as a shortcut.
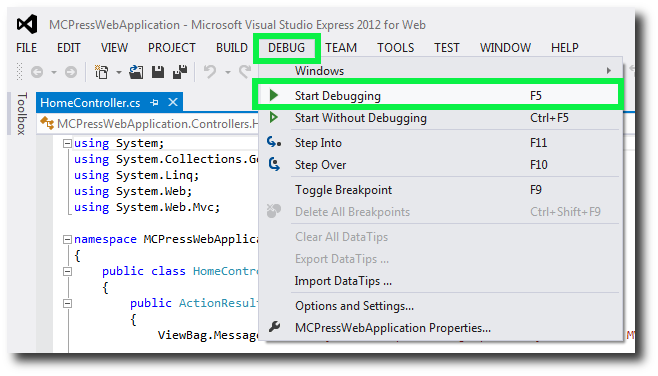
Figure 7: Debug your Web Application.
Once the Web Application starts in debug mode, it will fire up your local IIS web server to display your new website.
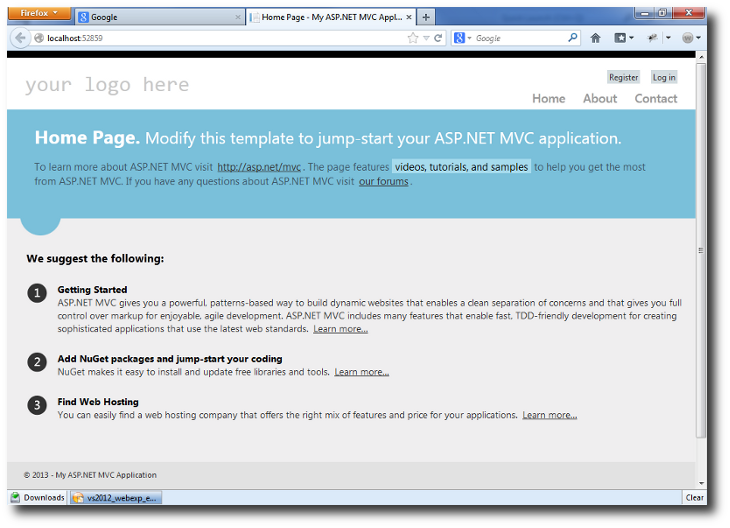
Figure 8: Here's your newly built website with style. Just add content.
When you have your site running in debug mode, you can set breakpoints in the code by double-clicking to the far left of the source code statements. Then, when the event is triggered through the website, your debugger will stop at the breakpoint, just as any other debugger would.
What's Next?
With my previous TechTip on Microsoft SQL Server 2012 and this article on Microsoft Visual Studio, I'm sure you can foresee where future articles are going...or can you? You'll have to tune in next time for the real fun stuff on how to use these tools.
I realize that following the bouncing ball of a Microsoft install isn't like working with exit points on the IBM i. But just take a quick skim over what's being proposed and imagine seeing all of those results after a few clicks. The task of going through the install may be worthy of a second look, especially if you have a specific direction to achieve specific results. Your new knowledge will then open up a whole world of questions and exploration into the new technology.
I hope you're enjoying my new series of TechTips that will expose you to what technologies are available outside of the IBM arena. I was raised in an IBM environment, so of course my first line of thinking is to look for features that I'm familiar with on the i. Finding equivalents is fun. But the real fun comes when you find completely new concepts and figure out how they can be leveraged on the i.
My current manager often uses the quote by Abraham Maslow: "If all you have is a hammer, everything looks like a nail." Well, with exposure to a wide variety of technological tools, you can better apply the right tool to the right problem.


LATEST COMMENTS
MC Press Online