We started some good stuff in Part 1. Now, let's look at more.
Editor's Note: This article is an excerpt from the book Subfiles in Free-Format RPG.
In Part 1, I introduced a technique for modifying data files using subfiles, showing you the DDS and sample screen to let a user update, add, and delete from a name file. In Part 2, we move on to the RPG code.
Figure 1 shows the RPG program F specs that work with the DDS. Notice that I have defined two subfiles in the F specs for display file SFL004DF. These two subfiles correspond to the two subfiles defined in the DDS.
FSfl004df cf e Workstn
F Sfile(Sfl1:Rrn1)
F Sfile(Sfl2:Rrn2)
F Infds(Info)
Figure 1: F specs for the display file in RPG program SFL004RG
When the user presses the Enter key in the main routine with nothing in the position-to field, the Process_Subfile subroutine is executed. Figure 2 shows this code snippet. The subroutine then reads the changed subfile records and processes them accordingly.
When (Cfkey = Enter) And (Ptname = *Blanks);
Exsr Process_Subfile; // Process options taken on the subfile.
Figure 2: Calling the Process_Subfile subroutine when the user presses Enter with nothing in the position-to field
Let's look at the Process_Subfile subroutine, shown in Figure 3. This routine contains a DO loop that reads the changed records in SFL1. When a user enters one of the valid options in the options field, including a blank (which can be done with the spacebar or field-exit key), the READC operation picks up that record and runs it through the select routine.
Begsr Process_Subfile;
Exsr Clear_Subfile_2; // Clear the confirmation subfile.
Readc Sfl1; // Read all changed records in the subfile.
Dow Not %eof; // Do while there are changed records.
Select;
Figure 3: Subroutine Process_Subfile, which processes the user options
Depending on which option was selected, the program will execute another subroutine (or, in the case of Option 4, write records to another subfile). Selecting options 2 and 5 will show the user a detail screen of data related to that subfile record. In this example, the detail screen will contain the address information of the name listed on the subfile record.
It is important to remember that users can select multiple records for processing. That is, a user can choose more than one record to be displayed, changed, or deleted. He or she can also select a mixture of the options to be processed. For example, suppose the user wanted to view subfile records 1, 3, and 5, delete records 9 and 10, and change address information on record 7. He or she would simply type the appropriate option next to each of the appropriate subfile records and press Enter.
The subfile records will be processed in the order in which they exist in the subfile. Because this is a self-extending subfile, the user could page down and select other records for processing without losing what was entered on the previous page or pages. The SFLRCDNBR keyword in the DDS allows me to display the page that contains the last record selected for processing by the user. Once the Enter key is pressed, all the changed records will be processed. If the user were to select options and then position to somewhere else in the subfile using the position-to field, however, everything previously selected would be lost. Selecting Option 5 allows the user to view information from the master record.
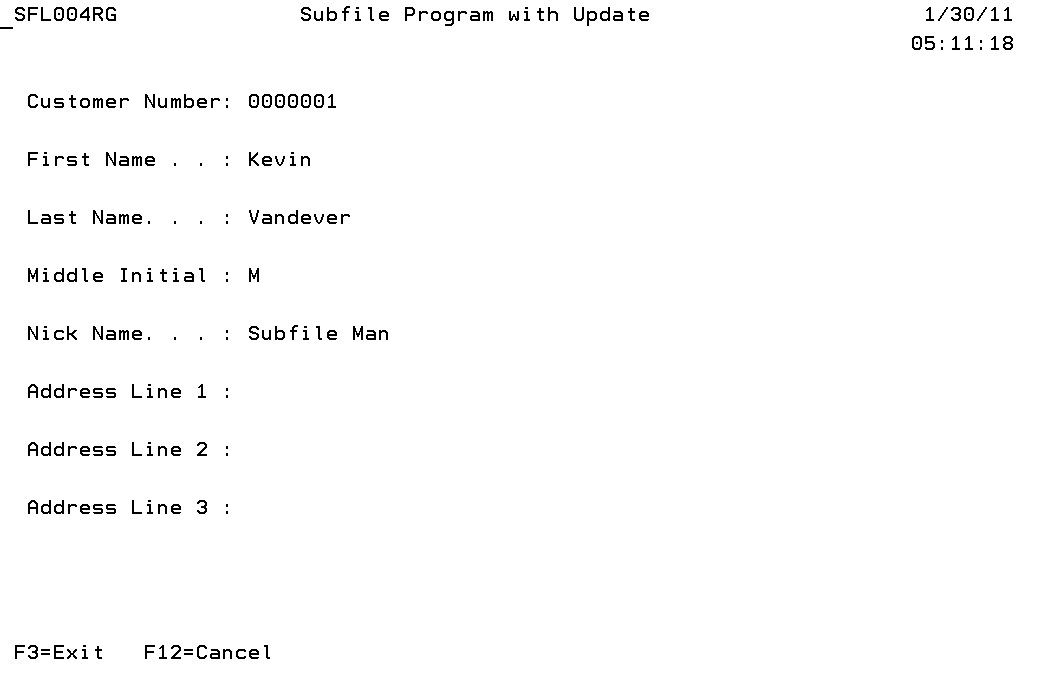
Figure 4 shows the screen displayed when Option 5 is selected from the subfile list. Figure 5 displays the associated code.

Figure 4: The screen that displays a record's detail
When Option = Display; // Option 5 is entered in the subfile opt
Eval Mode = *Blanks;
Exfmt Panel2; // Display the Display Detail screen.
Option = *Blank; // Blank out option field.
Update Sfl1; // Update the subfile.
If (Cfkey = Exit) or (Cfkey = Cancel);
Leave;
Endif;
Figure 5: The code from the Process_Subfile subroutine that processes a detail request from the user
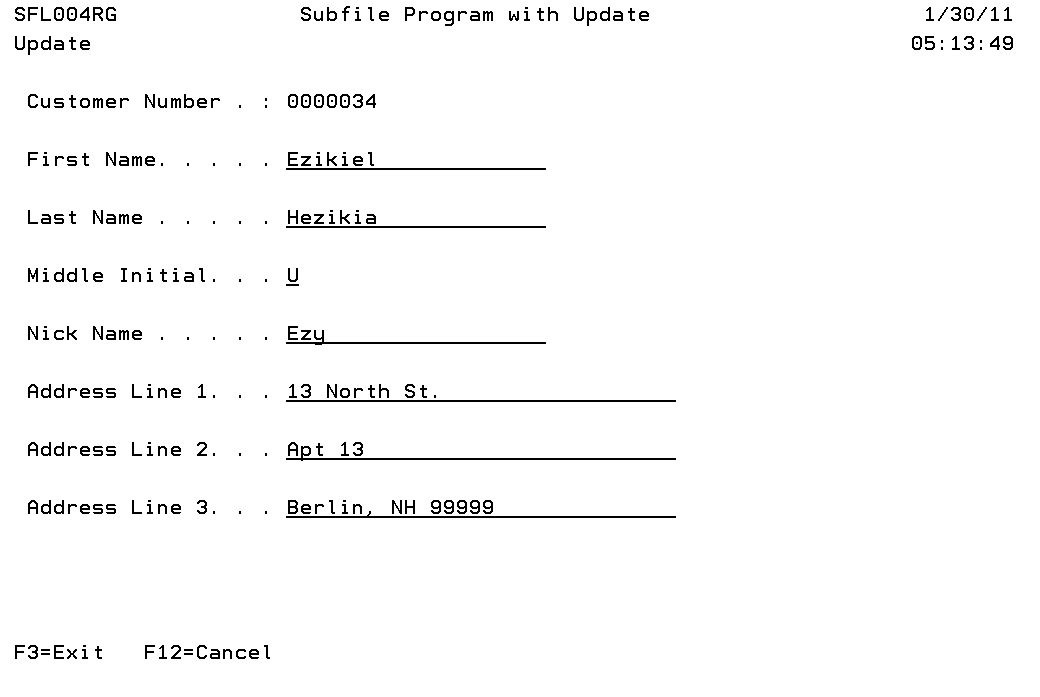
Figure 6 shows the screen that will be displayed when the user selects Option 2 (update). At first glance, it looks identical to the one in Figure 4, but there is a difference: the upper-left corner shows the word "Update." Another, more significant change is that the user is allowed to change the data fields on the displayed screen. This gives the user the ability to select subfile records and change the detailed information in them.

Figure 6: The screen used to update a record
Figure 7 shows the code for the screen in Figure 6.
When Option = Change; // Option 2 is entered in the subfile opt
Eval Mode = 'Update';
Exsr Change_Detail; // Display the Change Detail screen.
Option = *Blank; // Blank out option field.
Update Sfl1; // Update the subfile.
If (Cfkey = Exit) or (Cfkey = Cancel);
Leave;
Endif;
Figure 7: The code from Process_Subfile that processes an update request from the user
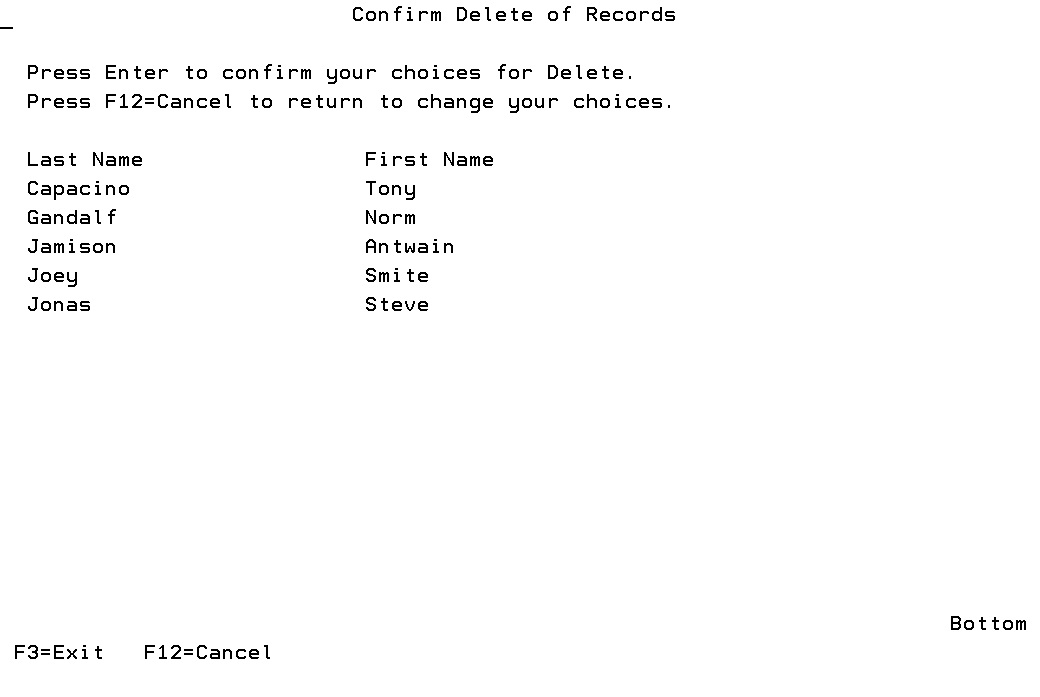
Now let's talk about Option 4, which lets the user delete records from the data file. It's important, as well as courteous, to provide a confirmation screen before allowing the user to delete records from a data file. I do this by building a load-all subfile that contains the records the user has selected for deletion. When the READC loop is finished processing (that is, after all the records selected by the user have been interrogated), I check to see whether I loaded any records into the delete confirmation screen, by checking the relative record number (RRN2). If RRN2 is greater than zero, I display the subfile using the EXFMT operation and wait for the user's response. Figure 8 shows the delete confirmation subfile, and Figure 9 shows the associated code from the Process_Subfile subroutine.

Figure 8: Screen confirming a delete request
When Option = Delete; // Option 4 is entered in the subfile opt
Rrn2 = Rrn2 + 1; // Increment the subfile record number.
Write Sfl2; // Write the deleted record to subfile.
*In74 = *On; // Mark record as changed.
Update Sfl1; // Update original subfile as changed.
*In74 = *Off; // Reset the SFLNXTCHG indicator.
Endsl;
Readc Sfl1;
Enddo;
// If records were selected for delete (4), throw the subfile to
// screen. If enter is pressed execute the Delete subroutine to
// physically delete the records, clear, and rebuild the subfile
// from the last deleted record (you can certainly position the
// database file where ever you want).
If Rrn2 > 0;
Lstrrn2 = Rrn2;
Rrn2 = 1;
Write Fkey2;
Exfmt Sf2ctl;
If (Cfkey <> Exit) And (Cfkey <> Cancel);
Exsr Delete_Record;
Setll (Dblnam) Sfl001lf;
Exsr Clear_Subfile_1;
Exsr Build_Subfile;
Endif;
Endif;
Figure 9: The code from Process_Subfile that processes a delete request from the user
Warning: Remember that the position-to in this self-extending subfile clears and rebuilds the subfile. If you use this example, be careful not to reposition the subfile with the position-to field unless you have processed all of your selections. Of course, you can change the logic to process the selected options before repositioning the subfile, by executing the Process_Subfile in the position-to when clause of the main routine, but I chose not to do that in this case.
Notice that when I write to the delete confirmation subfile (SFL2) in the Process_Subfile subroutine, I set on indicator 74 to activate the SFLNXTCHG keyword and update SFL1 with the UPDATE keyword. I then deactivate SFLNXTCHG by setting off indicator 74. This marks that subfile record for change, even though it has already been read by the READC operation and the user has made no other changes to that record. This is how I mark a record for change inside my program. Because I didn't clear the options field before updating the subfile, the "4" remains on the subfile record. This way, the user can choose to remove any records he or she doesn't want to delete, press Enter, and the records left marked "magically" show up on the delete confirmation screen.
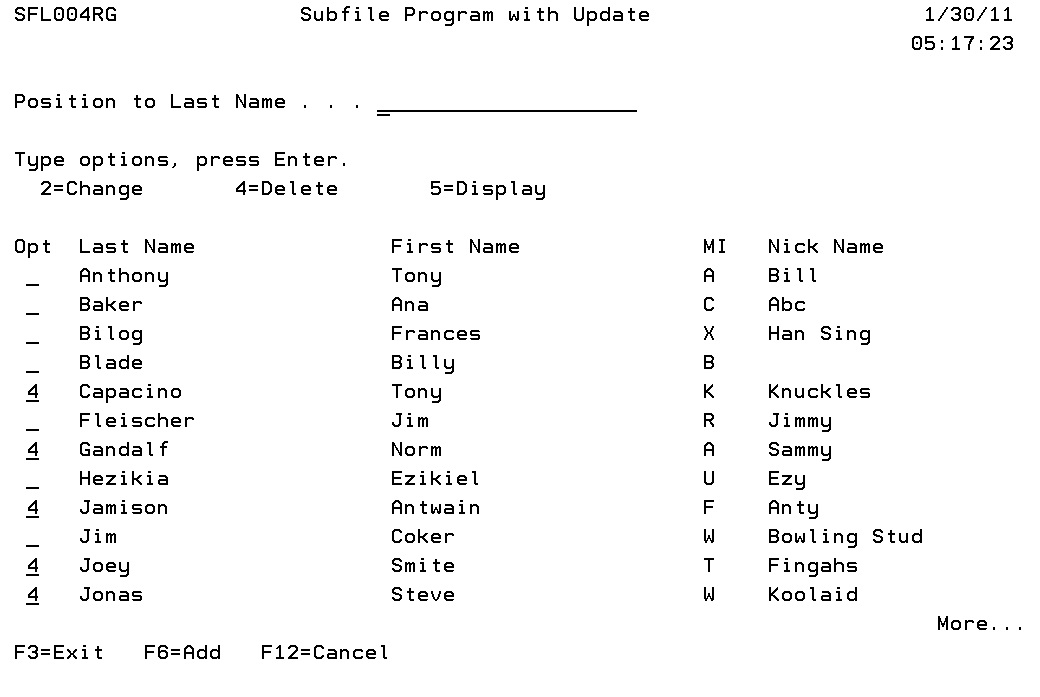
Figure 10 shows the screen displayed if the user selects F12 from the delete confirmation screen. Notice that the records selected for deletion are still marked with 4s. I did this in case the user didn't like what he or she saw on the confirmation screen and wanted to "undelete" an individual entry or two. The user could simply press F12, remove the 4s from the records to "undelete," and then press Enter to get a new confirmation screen, without reentering all the records to be deleted. The SFLNXTCHG keyword makes this possible.

Figure 10: Redisplaying the original choices when the user cancels from the delete confirmation screen
Figure 11 shows the Delete_Record subroutine, which is executed from the Process_Subfile subroutine when the user specifies delete. The program clears the original subfile (SFL1) and reloads it—minus the deleted records, of course.
Begsr Delete_Record;
For i = 1 to Lstrrn2; // Loop until no more records to delete.
Delete (Dbidnm) Pfr;
Endfor;
Endsr;
Figure 11: The Delete_Record subroutine deletes the records selected by the user
Add to the Fun with Add Capability
This program also includes the ability to add records to the data file. I won't detail this logic because it really has nothing to do with subfiles. The user can press F6 to add a record to the data file. The program then displays a screen similar to that used for modification (Option 2 from the subfile). The user can enter the new information and add that data to the data file by pressing Enter. Once the add routine is finished, the program clears and reloads the subfile so it will include the newly added record.
You're Now Ready for Master File Maintenance
You've just seen a very useful template for a Name Master File Maintenance program. The user can view, change, and delete data from a data file. I use this type of subfile program when I'm working with files that will have a limited number of additions and modifications.
"What's limited?" you might ask. For me, limited is something of master file-like quality. Master files are not transactional files, meaning you won't have users pounding away at the keyboard adding data to them. My program doesn't lend itself very well to that kind of work. For one, you have to press F6 every time you want to add a record. This becomes very time-consuming if there are hundreds or thousands of records to add to a file, as is sometimes the case with transactional-type files such as an order-entry detail file.
If you'd like to learn a subfile technique that's not only able to keep up with the most skilled data-entry professional, but might even enhance his or her skills, check out more of my book Subfiles in Free-Format RPG.


LATEST COMMENTS
MC Press Online