A more “modern” alternative to STRSQL, discussed in the last two articles, is the i Navigator’s Run SQL Scripts tool. Let’s explore it together, shall we?
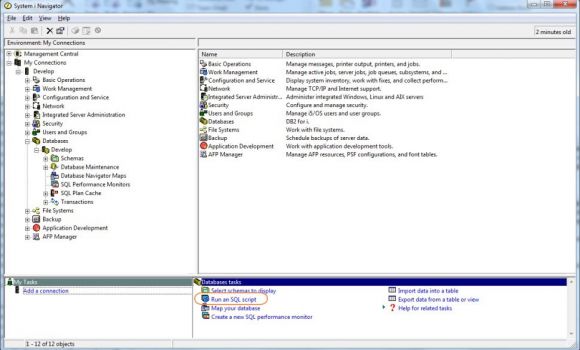
While STRSQL is a green-screen tool, Run SQL Scripts is part of the i Navigator package. You can access it by choosing the Run SQL Scripts option, either from the bottom-right pane of the i Navigator window after you’ve chosen the Databases tree node from the right panel, as shown in Figure 1, or by right-clicking the database name and choosing the respective option.
Figure 1: Choose the Run SQL Script option in i Navigator’s bottom pane.
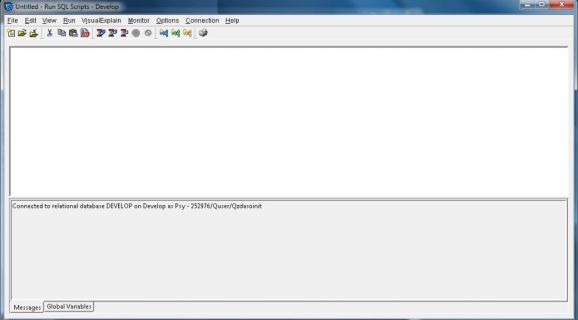
Either action will cause a new window to pop up: the Run SQL Scripts tool, shown in Figure 2. Here you can execute SQL statements just like STRSQL but with a more user-friendly and modern interface.
Figure 2: The Run SQL Scripts window looks like this.
Let’s take a closer look at the interface. Under the Edit menu, you’ll find the “Insert From Examples…” option, which will show an extensive list of examples. This list contains SQL statement examples and even a few CL command templates, which you can easily adapt to your needs. Just below the menu, you’ll find the heart of the tool: the command input pane. Here is where you enter your statements by typing them, using either the examples or simply copy/paste, because this pane behaves like Window’s Notepad in many ways.
When you’re finished creating your command, you can run it via the Run menu. You’ll find that it contains three options:
- Selected—This option executes the selected or highlighted statement or statements. If you don’t have a statement selected, the statement where the cursor is currently positioned will be executed.
- From Selected—This option executes a subset of the statements that exist in the input pane, starting with the currently selected statement and ending with the last statement in the input pane. (Maybe IBM should have called this option “Execute from Here to the Bottom” instead.)
- All—The final option available is quite straightforward. It executes all the statements, starting with first statement in the pane and ending with the last.
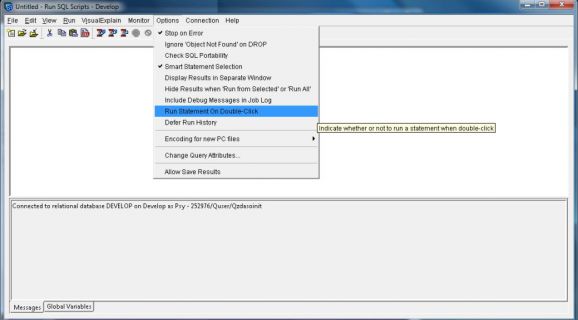
There’s also an option that simplifies running a single statement. If you go to the Options menu and click Run Statement On Double-Click, you’ll be able to run statements more quickly, without having to go to the Run menu, as shown in Figure 3.
Figure 3: The Run Statement On Double-Click option lets you run statements quickly.
Note that the Examples dropdown list contains SQL and CL templates. This means that you can write a script that contains both SQL statements and CL commands, in whichever order you like, as long as you prefix your CL commands with CL: . (CL, then a colon, and then a blank space). For instance, if I wanted to clear the file MYFILE from library MYLIB, I’d just type the following command and execute it using one of the aforementioned options:
CL: CLRPFM MYLIB.MYFILE
Beware, however: Not all CL commands are allowed! You can only use batch-compatible commands. This means, for instance, that DSP* commands that direct output to the screen are not allowed.
This ability to execute CL commands and mix them with SQL statement in your input pane allows you to build proper scripts. Naturally, “proper scripts” usually include some sort of documentation. In this context, you can use double dash characters (--) to write a single line comment, just like you’d use double slash characters (//) in free-format RPG. For longer, multi-line comments, you have to use /* and */ to delimit your comment lines, for instance:
/*
This is a set of multiple
comment
lines
*/
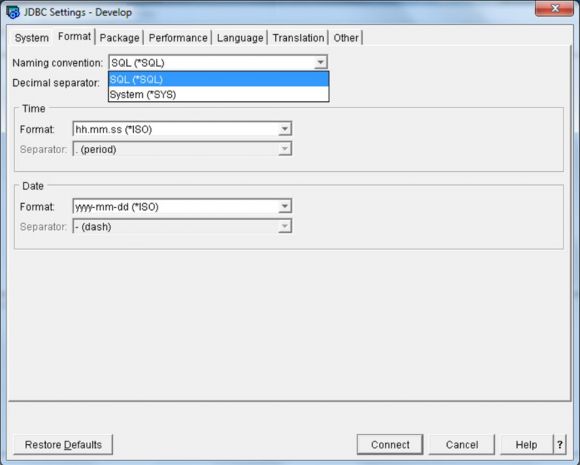
Regarding the writing style of the statements, Run SQL Scripts also offers the *SYS and *SQL options that STRSQL does, but here the default is *SQL, which means that the database engine is expecting a dot (.) instead of a slash (/) as the separator between the library and file names. In order to change it, you need to go to the Connection menu in the top tool bar and click JDBC Settings. When the window pops up, click the Format separator. You’ll see something similar to Figure 4.
Figure 4: The JDBC Settings window allows you to change the naming convention.
In this window, you can change, among other things, the naming convention from *SQL to *SYS or vice versa. When you’re happy with your choices, confirm them by clicking the appropriate button (the label varies with the version of Client Access) and close the window.
Go ahead and write a statement or two. Remember that regardless of the naming convention you choose, you must end all SQL statements and CL commands with a semicolon (;).
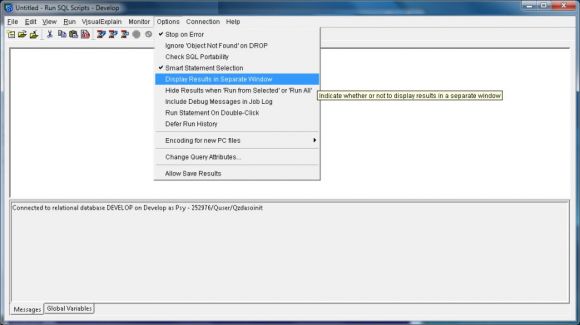
You’re now ready to run your statements. After the statements are executed, the output pane, which sits just below the input pane, will show the results. This pane will have at least two flaps or separators, one for the results themselves and another for the messages generated by the execution of the script. If your script contains more than one SELECT statement, it’s possible to see multiple result separators—one for each SELECT. If you want to see the results in separate windows, you need to go to the Options menu and click Display Results in Separate Window, as shown in Figure 5.
Figure 5: Choose the “Display Results in Separate Window” option.
Finally, you can save your scripts as text files, using File > Save, as in most applications. Saving your scripts is particularly useful when you’re working with DDL statements, because you can create a script that drops all tables and associated SQL objects, and recreate them with just a few clicks. You write the script once, save it, and then you can open and run it later. There’s a lot more you can tweak in this tool, but these basic notions should be enough for now. I might discuss some neat features, like the Visual Explain, later in this series. There’s not a lot of documentation about it online, so whenever I have a problem, I tend to go to IBM’s knowledge database to look for solutions.
For those of you who already have the new Client Access Java version, named Access Client Solutions, I’ll be discussing the new and improved version of Run SQL Scripts on the next TechTip of this series. There are a gazillion other tools that you can use, like WinSQL, Toad, and IBM’s new RDi Database Explorer tool. Most provide similar functionality to the two presented in these last few articles. Find one that suits your needs and learn as much about it as you can. The time you invest now will be time you’ll save later.


LATEST COMMENTS
MC Press Online