Add MySQL, the most prevalent free database in the Linux world, to your development machine. MySQL completes the LAMP stack.
The previous article on PHP guided you through the first part of Catherine Gaughan-Smith’s third video tutorial on installing the Ubuntu LAMP stack. That part of the video focused on PHP, leaving the remaining five minutes or so to cover the installation of MySQL. Today, we’ll work through that portion. We’ll configure MySQL, and we’ll also add a new SQL plug-in called DBeaver to our PHP Development Tools (PDT) environment.
MySQL: The DB2 of the Linux World
This is a concept that’s often even more alien to us old green-screen types than PHP. PHP is basically just adding a compiler, and we’re at least used to the difference between COBOL and RPG, even if we don’t code in both. So configuring PHP isn’t a completely bizarre concept. But configuring our database? That’s crazy! Heck, when I started in this biz, our database didn’t even have a name. It was just “the database.” But in the Linux world, you can pick your database. You can even use DB2, which is the official name of the database we grew up with.
One big difference between the Linux world and the RPG world is that all access to the database in Linux is performed using SQL syntax. If you’ve written embedded SQL code (SQLRPGLE, or even old-school SQLRPG), then you’re already comfortable with the basics. If not, you’ll need to start cracking some books (or Googling, as the kids say these days). You will have to understand SQL to do LAMP development, so we'll assume that you understand SQL basics and are ready to perform the installation. The video walks you through that installation process.
Using the Tutorial
Now it's time to go back to Catherine Gaughan-Smith's third video. My previous article covered the first 10 and a half minutes of this video, in which Catherine configured PHP. The other portion is about configuring SQL. It's only five and a half minutes, and of that we'll only use about three minutes and 45 seconds. That's because the first 30 seconds centers on port forwarding, which if you recall from the very first article in this series, we don't use. The last minute and a half introduces the standalone MySQL workbench, which doesn't plug in to the Eclipse PDT, so instead I'll show you how to add my favorite SQL plug-in, DBeaver.
Since we're using a very small (but important!) piece of the original, the timeline is similarly brief. The SQL portion starts at 10:30 into the video, but we ignore the first 30 seconds (port forwarding, as mentioned above). We use the next two portions: the MySQL configuration lasts until 13:30, followed by MySQL setup until 14:45. The remainder of the video is MySQL workbench, and I'll instead provide an alternative.
Another Benefit of PDT
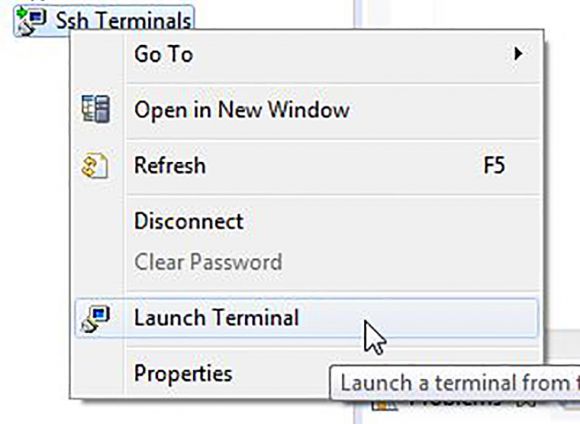
At 11:30 of the video, Catherine immediately goes to the standalone terminal software on her Mac desktop. Remember, we don't use a standalone terminal; we use the PDT terminal. Right-click on the SshTerminals option in your Remote Systems view and select Launch Terminal.
Figure 1: Right-click on Ssh Terminals for the context menu and select Launch Terminal.
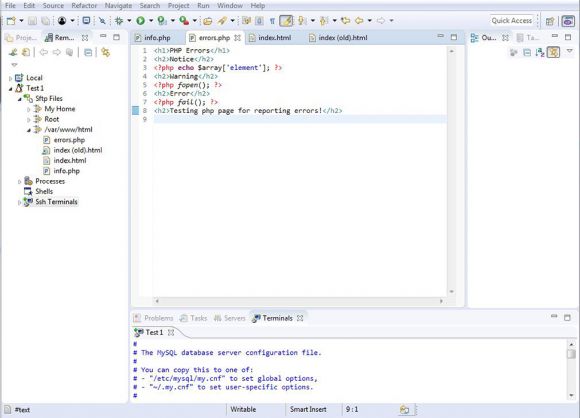
This brings up a terminal connection, as shown in Figure 2.
Figure 2: You see a Terminals tab for the connection to our Test1 machine.
This is where it gets fun. We need to edit a rather large file, which can be clumsy in the little window shown. But because this is Eclipse, we can take advantage of its windowing capabilities. You can maximize the Terminals tab by simply double-clicking on that tab; this will expand the tab to take up the entire size of the PDT window. My new favorite method, though, is to detach the tab. Right-click on the newly created terminal tab and select Detach. This will create a standalone window that you can make as tall as you want! Either way, you'll end up with a lot of room to do your work. Remember, we will use vi because nano doesn't work very well in PDT. Execute the following command in the detached tab:
sudo vi /etc/mysql/mysql.conf.d/mysqld.cnf
Here's what the tab looks like, showing off the nice color-coding for comments (you won't see that in a standalone terminal).
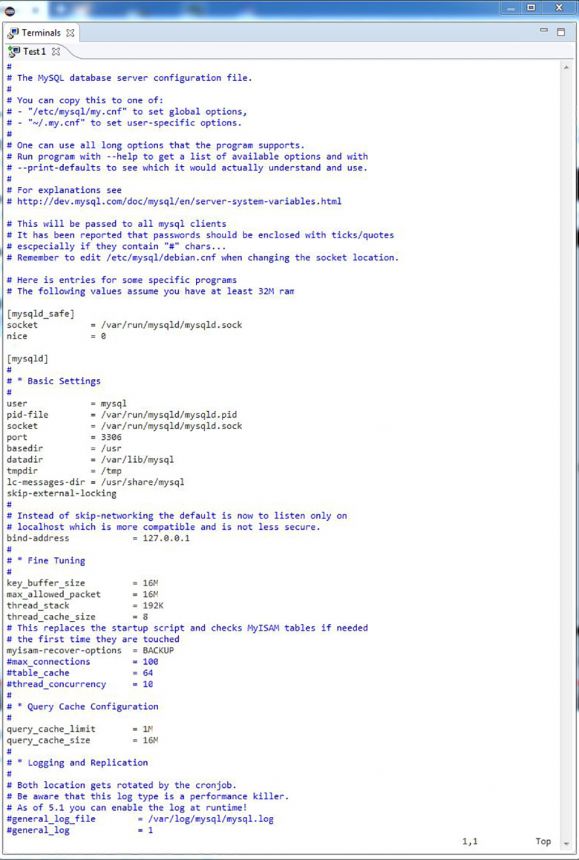
Figure 3: This is a detached editing tab.
Do all the editing that Catherine indicates, and then restart MySQL as shown in the tutorial. This takes you to 13:30 in the video. The next minute or so is devoted to making MySQL respond to requests from outside the virtual machine. That's important, because not only will it allow us to use the DBeaver plug-in that we're about to install, but it also allows the IBM i to directly access the database on the server. That's important if we plan to use the Linux machine as a data repository that’s refreshed by the host. That's only one architectural model, of course. For example, we could have an asynchronous job on the Linux machine reach out to the IBM i for data. But we're going to spend some time using the Eclipse PDT to directly update data on the Linux machine, so this is a good practice.
Install DBeaver into the Eclipse PDT
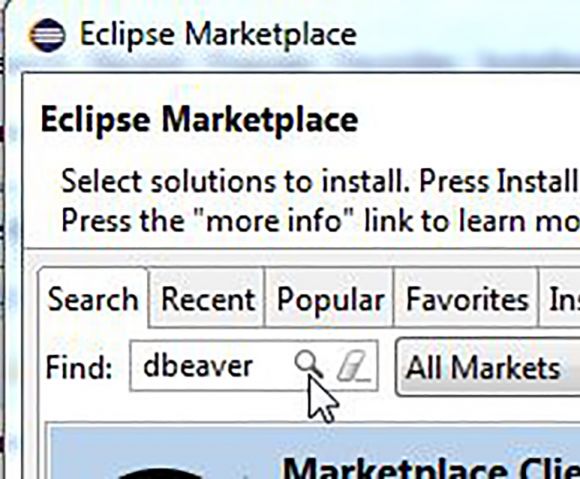
The real beauty of Eclipse is that it was built from the ground up to be extended. You may find prepackaged toolsets (like IBM's Rational Developer products), but the underlying tenet of Eclipse has always been that the developer is the person who knows best which tools they need. And so, Eclipse continues to make it easier to add these tools, also known as plug-ins. The second article in this series added the Remote System Explorer plug-in. We'll follow nearly the same steps to add another plug-in named DBeaver. From the main Eclipse menu, select Help > Eclipse Marketplace …, then type in DBeaver in the search window:
Figure 4: Type "dbeaver" into the search box.
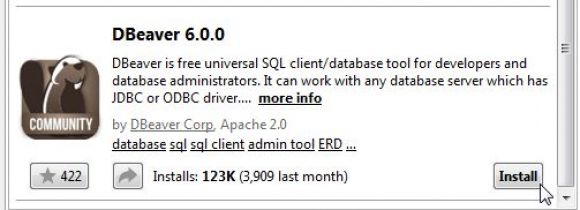
There are a number of DBeaver-related entries; you'll have to scroll down to get to the actual DBeaver client (at this writing, the client is at version 6.0.0). Find it and click on the Install button.
Figure 5: The DBeaver client is at the end of the list; click Install to install it.
Click through the confirmation and license agreement, and the software will be installed. You'll probably have to accept a certificate, and eventually you'll need to restart the PDT. At this point, you'll have the DBeaver plug-in installed and you can configure a connection to your Linux virtual machine.
Configure a Connection to MySQL in Linux
Using the MySQL database requires two steps: configuring the connection and then initiating an SQL session. You only need to configure the connection once.
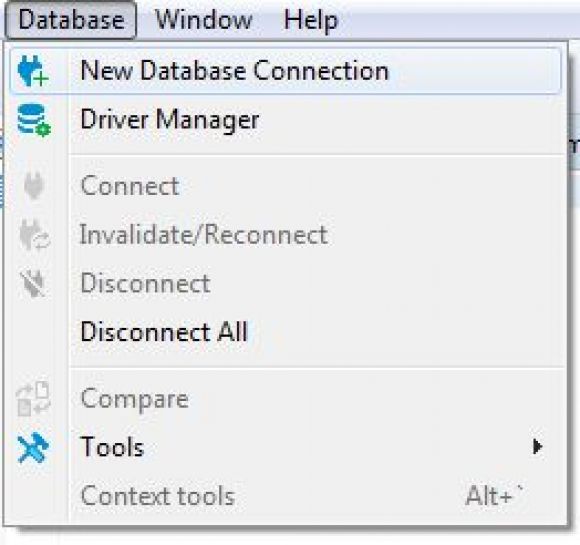
Figure 6: Create a new database connection.
Start from the new Database option in PDT's main menu. Click on that and then select the New Database Connection option.
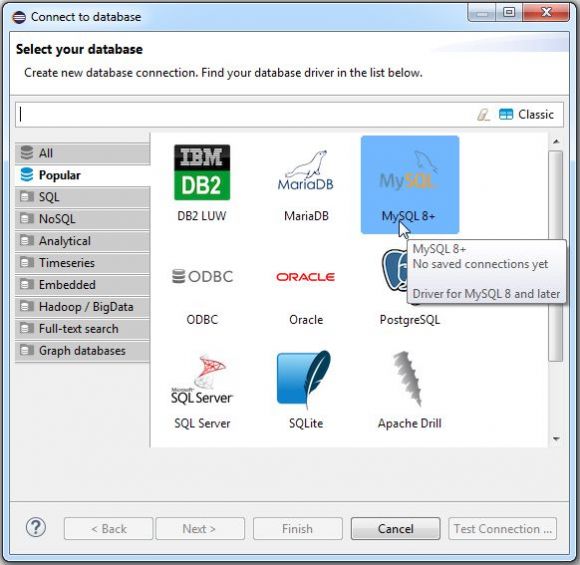
Figure 7: Select MySQL as the database.
A prompt comes up that allows you to set up many types of connection, but the good news is that the one you want, MySQL, is prominently displayed as one of the default options.
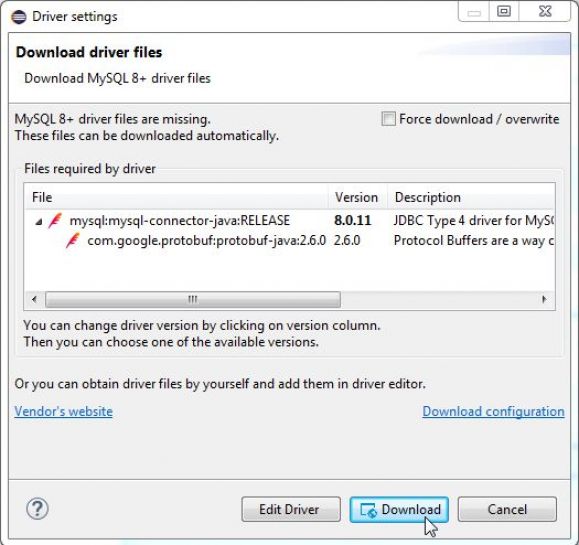
Figure 8: DBeaver will download the latest driver for MySQL.
One of the first things that will happen is the plug-in will recognize that you need some drivers. Typically, you'd have to download those and put them in a folder to be available to PDT, but the DBeaver plug-in handles all of that for you. Just hit the Download button and let it run.
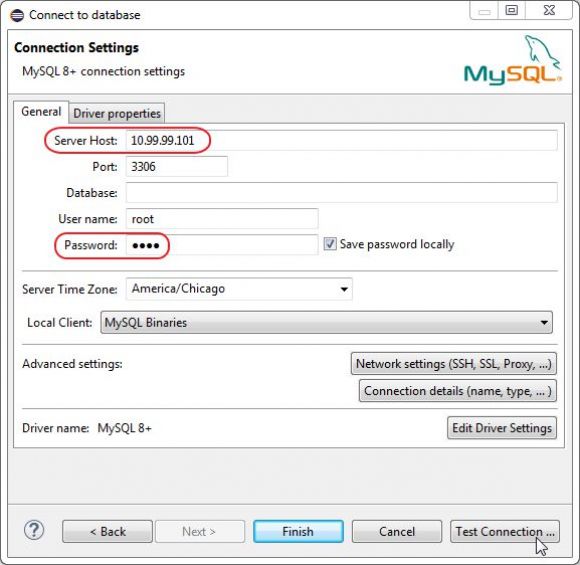
Figure 9: Add the parameters, which will connect to your Linux VM and test the connection.
Next, key in the IP address of your virtual machine and the password for your MySQL connection. Because I originally configured my Linux VM to use a bridged adapter instead of network address translation and port forwarding (for more information, refer back to the original article), I can leave the port at 3306. I do have to specify the password for user root, which you may recall was also root. Not secure, but easy to remember. Finally, just hit the Test Connection… button.
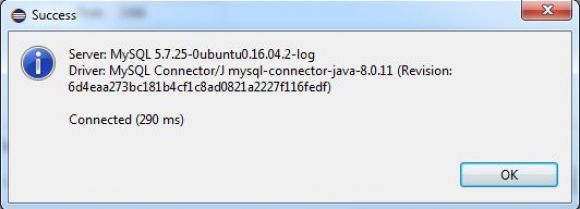
Figure 10: The result of the test should be a success.
If you don't see something like the window above, then you've got something misconfigured. You'll want to go through things carefully to see what might have gone wrong. If nothing is obvious, just start from the beginning. The beauty of using virtual machines is that you can just start over without worrying about clearing disk drives or whatever.
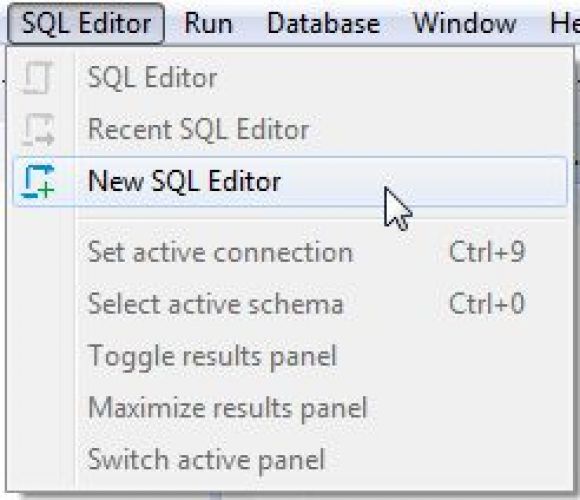
Figure 11: Create an editing session for the new connection.
If your connection is successful, you only have a couple additional steps to complete. First, create a new SQL editing session (or editor) using the SQL Editor menu. During the creation process you'll select the newly created connection.
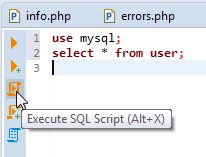
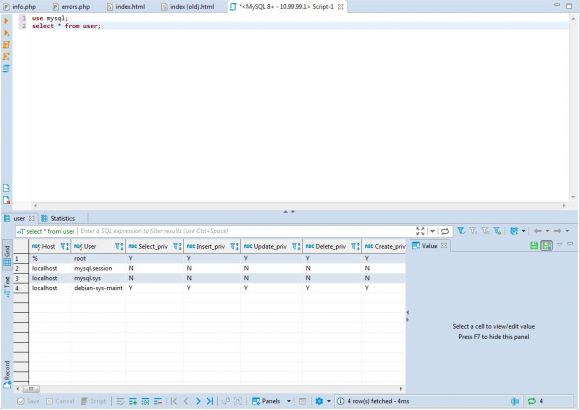
Figure 12: These two statements will query the system user table in MySQL.
In the newly created and opened SQL editor, type in the commands as shown. This switches to the MySQL configuration database (an internal database named mysql) and then lists all the users in the user table. Not something you'd do in a production environment, but it's an easy test that's always available.
Figure 13: This is what the correctly configured SQL editing session looks like.
If you've done everything correctly, you'll see a panel that looks very much like this. If you've used graphical SQL clients, this should be familiar. If not, you'll need to get familiar. But for now, we've gotten quite far, setting up a complete LAMP stack.
Coming Up
In the next article, I hope to show you how to make this VM interact with the IBM i. Until then, you can get your feet wet with MySQL by using some of the many tutorials and examples on the Internet. One place to start is here. Have fun!


LATEST COMMENTS
MC Press Online